How to create a document
Scenario
You want to create a new document or letter for a patient.
New letter window
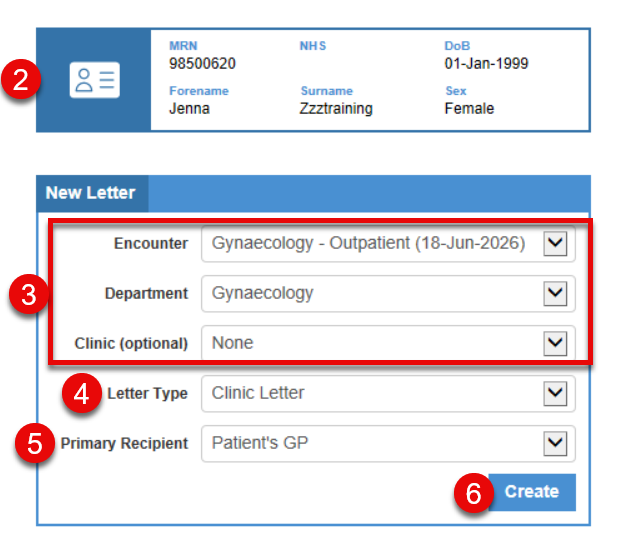
- With a patients record open, select Document Creation in the blue menu.
- The ‘New Letter’ window opens. Ensure the correct patient details display at the top.
- Ensure the Encounter, Department and Clinic is selected.
- Select the required Letter type.
- Set the Primary Recipient.
- Click Create. The document creation screen will open.
Document Creation Screen
- After clicking Create, the letter template for the selected Letter Type will display.
- The pencil icon indicates free text areas. These areas can be typed or dictated into. Information can also be added using the Autotext or Data tabs.
- Recipients can be added or the primary recipient can be changed in the top left.
- Carefully check that the correct details are displayed in the Details tab
It is very important that all information in the Details Tab is correct.
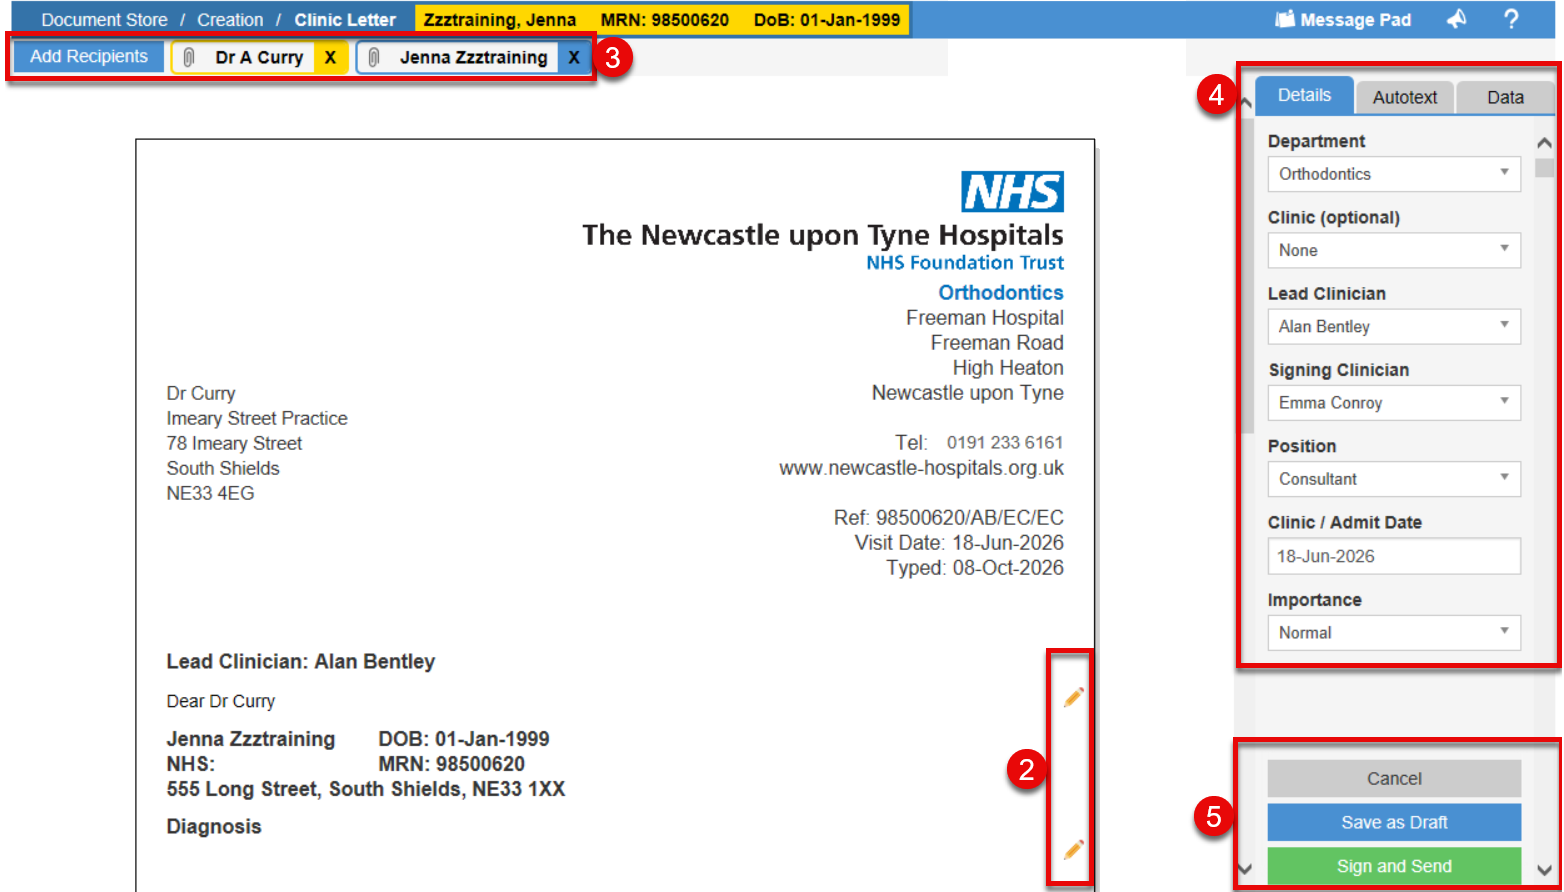
- At the bottom right the following options will display. Select the appropriate option:
- Cancel – cancel document without saving it.
- Save as a Draft – will save into the Draft Documents List.
- Save and Finalise – this option will display if the logged in user is not selected in the Signing Clinician box. When this option is chosen this document will be added to the Document Signing list of the selected Signing Clinician.
- Sign and Send – this option will display if you are correctly logged in and you are selected as the Signing Clinician.
After signing, the document needs to be released for print via the Document Store Print App.
This is usually done by a sectary or admin support. If you have written your own letter, you must let your clinical administrator know to ensure that it is sent for printing.