Document Signing List
Scenario
You want to sign your finalised documents.
Instructions
- Within PowerChart, select Doc Signing form the tool bar, or from the View menu.

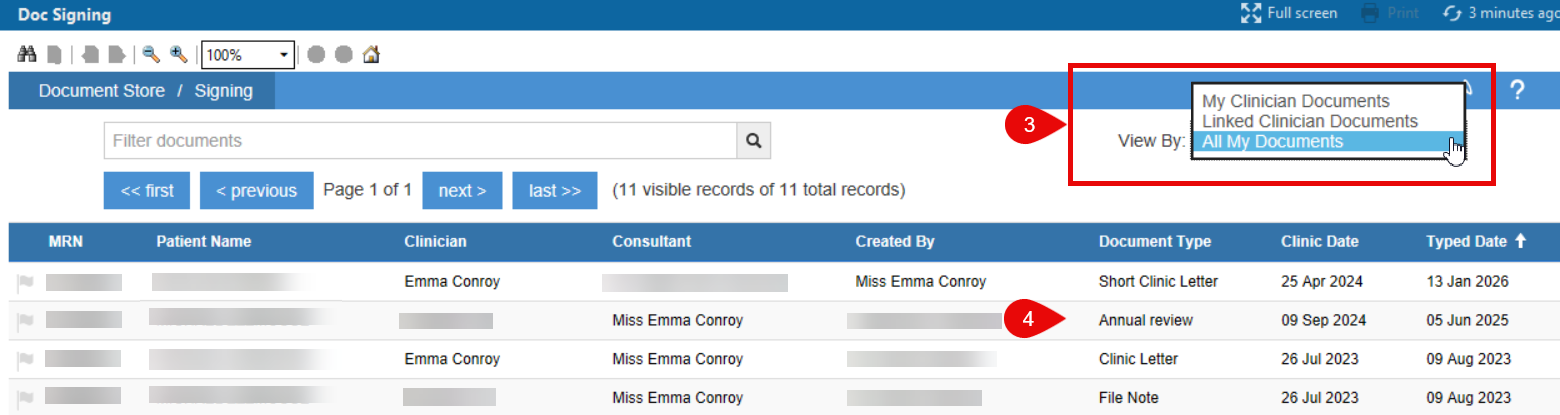
- A list of finalised documents associated to you will display.
- Check the View By drop down list to ensure you can see the correct list of documents, i.e.
- All my documents – where you are the lead consultant.
- My Clinician Documents – for documents written by your clinician that you are checking or
signing.
- Click a document to open it.
- When the document opens you will have these options in the bottom right corner:
- Edit – the document will open for you to make any amendments. It will then give you the option to Sign and Send the amended version.
- Reject – if you no longer need the document or it requires amendments. This will drop back in to the Document Finalisation list but remember to let the secretary know as well.
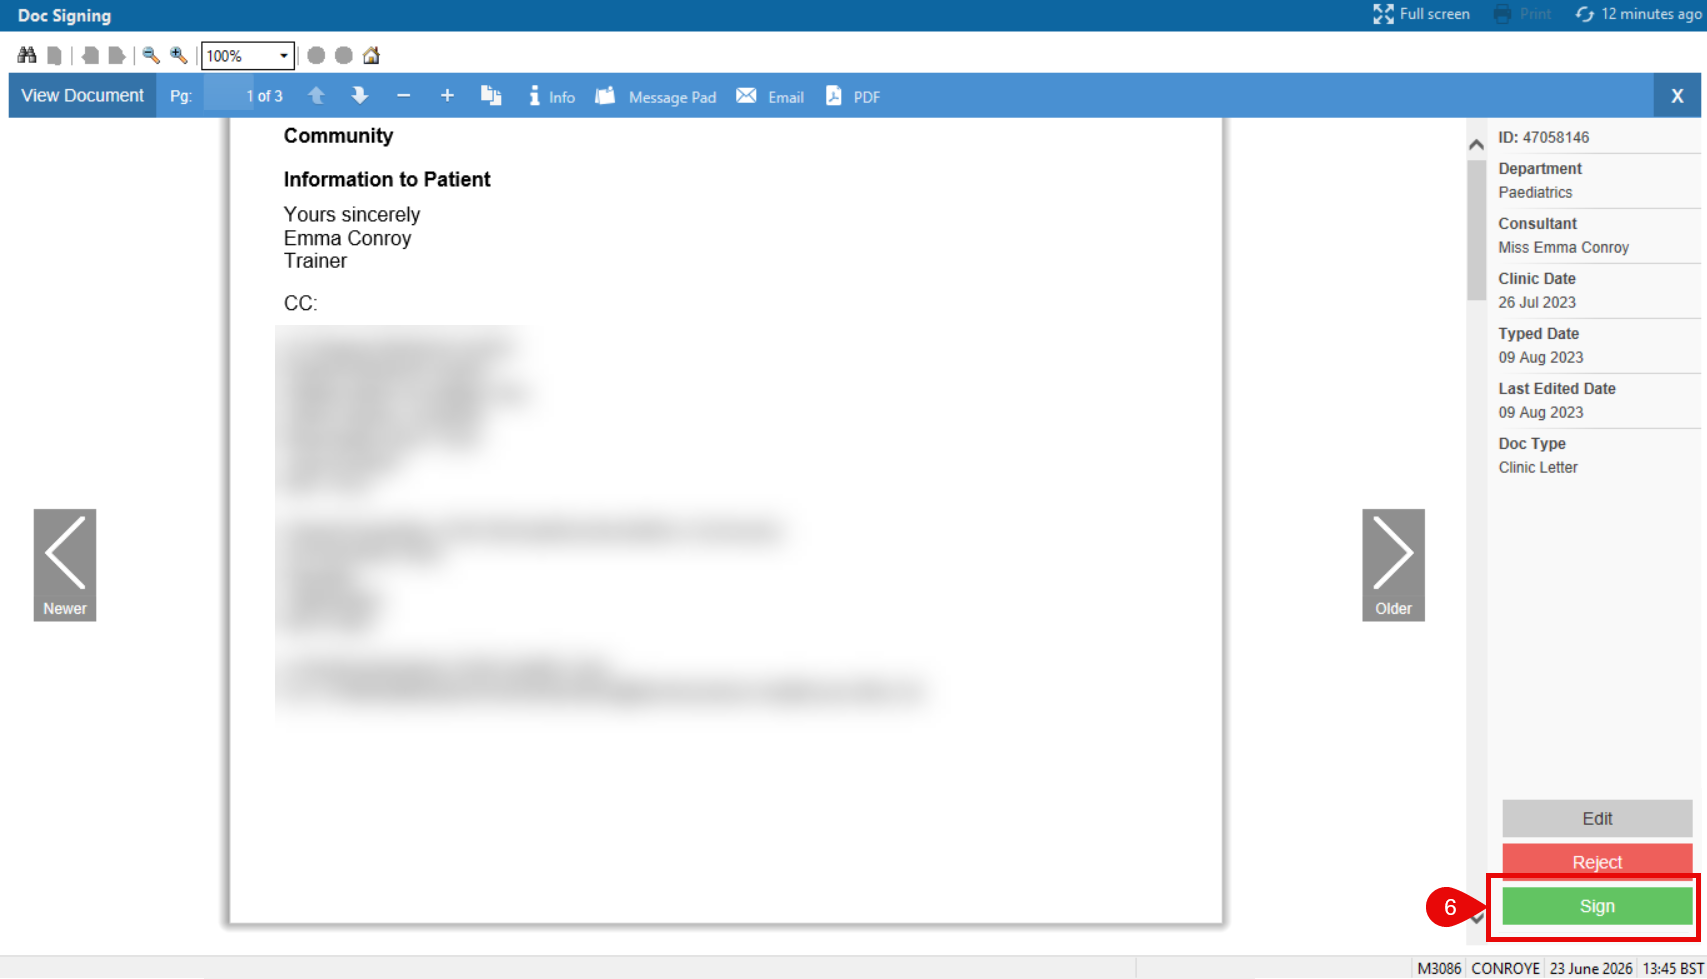
- Sign – when you are ready to sign you must scroll down to the very bottom of the letter to activate the Sign button.
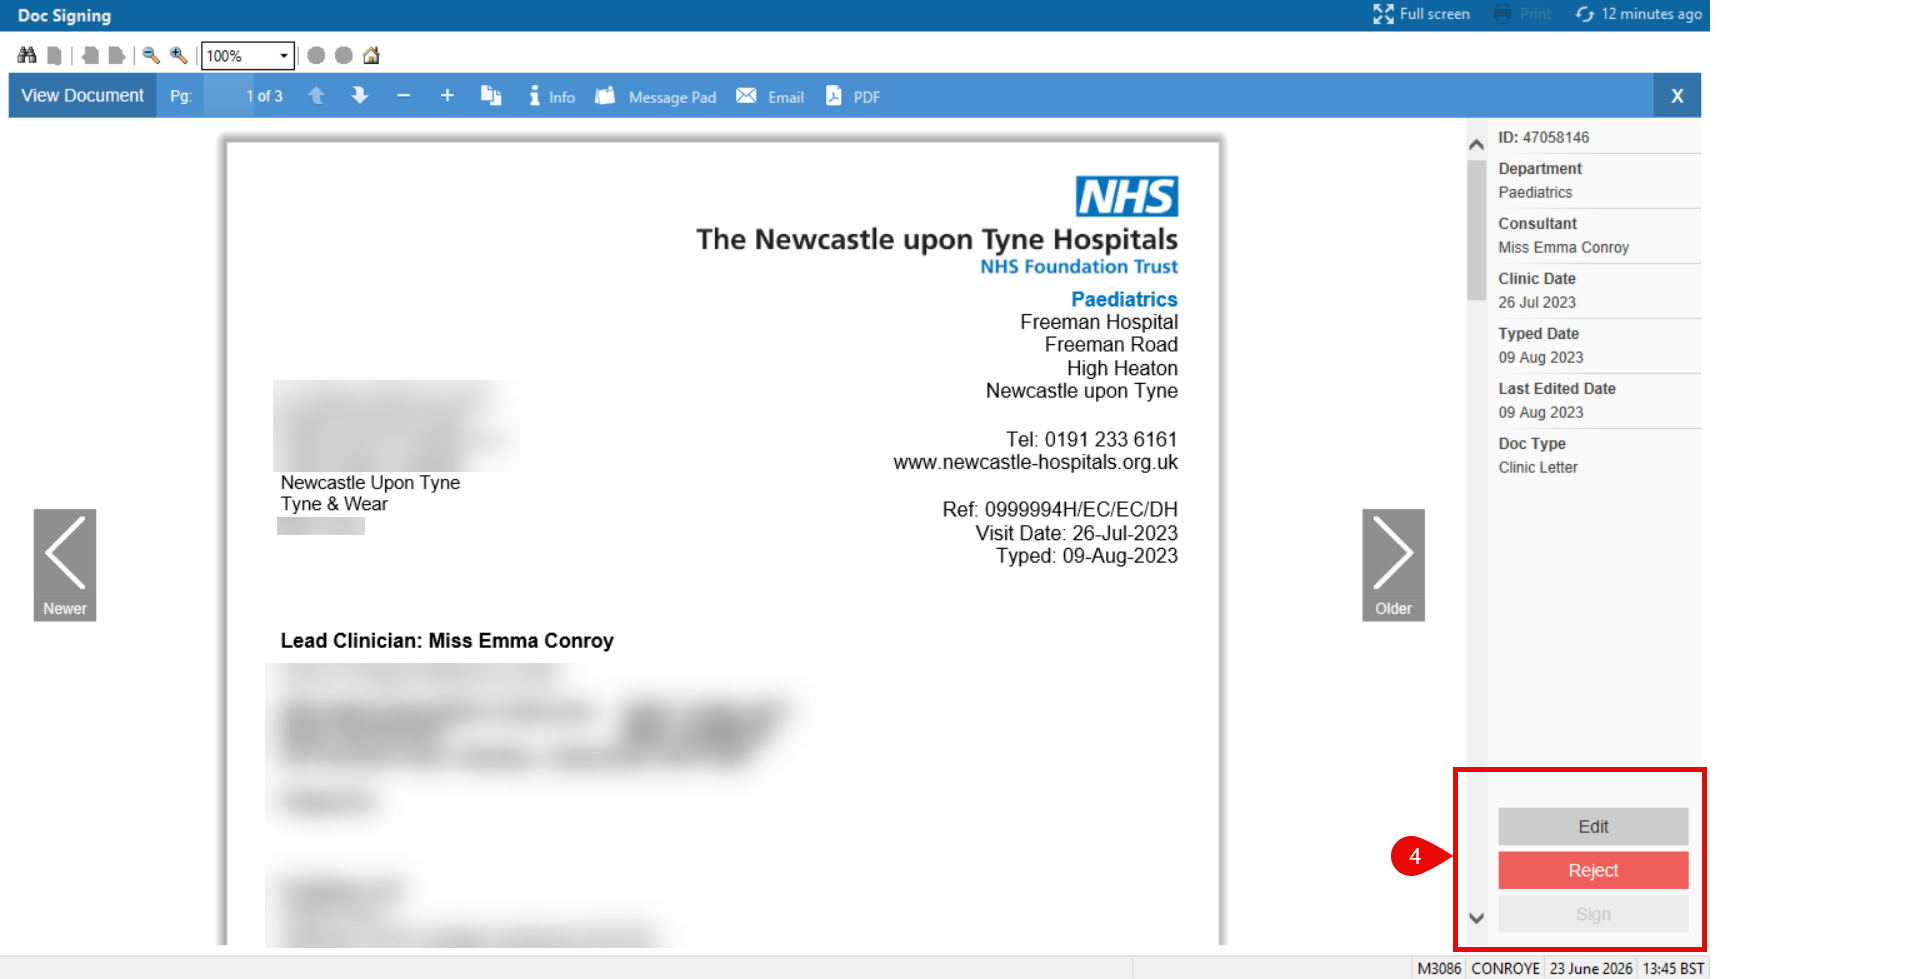
- When the button is Green you can then Sign the document.
- The document will disappear from your signing list and will be available for your secretary to Send. If you have written the letter yourself you will need to let the secretary know that it is ready to send.
Once signed the document needs to be sent via the Document Store Print App. This is usually done by a sectary or admin support.
Discharge Summaries
If the Discharge Summary should be signed by another Dr and it appears in your Signing list it may be that they have not included their name as the Signing Clinician or they have Saved the document rather than signing the document.
You can REJECT the Discharge Summary and it will drop back into the list for that Ward, appearing as
Draft ready to be amended.