Recipient Management
Scenario
This guide shows how to change the primary recipient and how to add additional recipients to a document in Document Creation.
New Letter Window
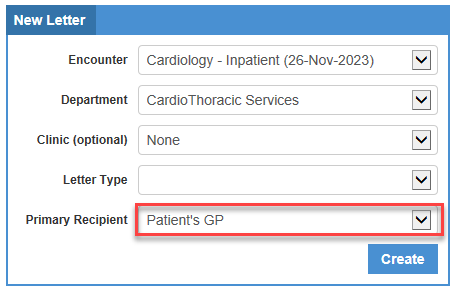
You have opened a patient record and clicked on document creation.
- In the New Letter window, select the primary recipient. This is the person you are writing to.
Document Creation Screen
After clicking Create the recipients can be managed in the top left area of the screen:
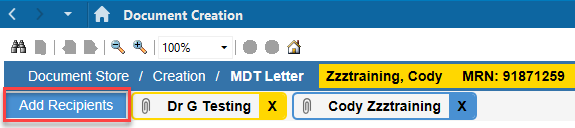
- The primary recipient, the person you are writing to, is highlighted with a yellow border.
- Any other recipients are shown with a blue border.
- You can change primary recipient by clicking and dragging another recipient into its place.
- Recipients can be removed by clicking on the X.
- Use the Add recipients button to add others.
Recipients search
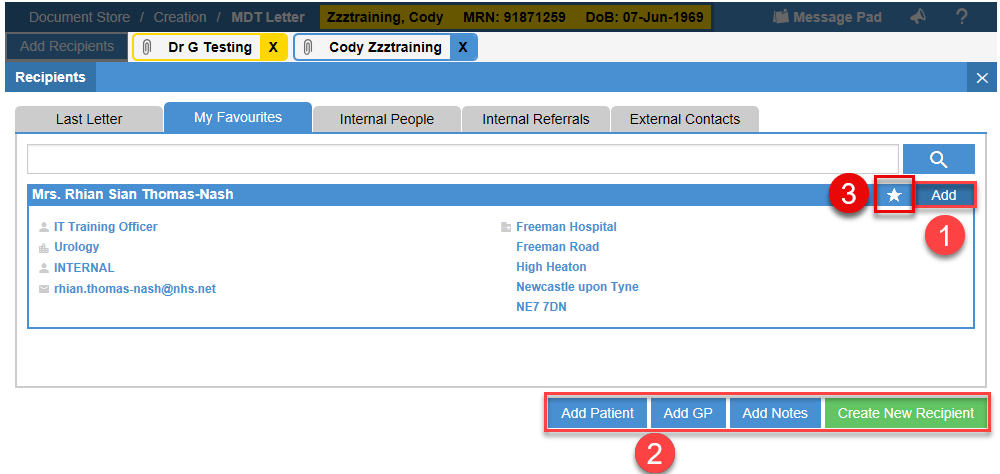
When you select the Add Recipients button the the following screen displays:

- Last letter – displays the recipients of the last letter.
- My Favourites – displays any of your saved contacts.
- Internal People – you can search for people within the Trust. If added to a letter, internal recipient will receive an email with a link to PowerChart and the document.
- Internal Referrals – search by department, not individual.
- External Contacts – allows for searching of a directory of other organisations such as hospitals, GPs, etc. Once organisation is found, can add all or a selected member of staff.
Add a recipient
- Find the recipient you want to add by selecting/searching then click the Add button.
- At the bottom, the following functions are displayed:
- Add patient
- Add GP
- Add Notes
- Create New Recipient – if the recipient is not found when searching, they can be added here.
- Click the star icon to the left of the Add button to save this recipient to your My Favourites tab.