Schedule an Appointment from the Waiting List
Scenario
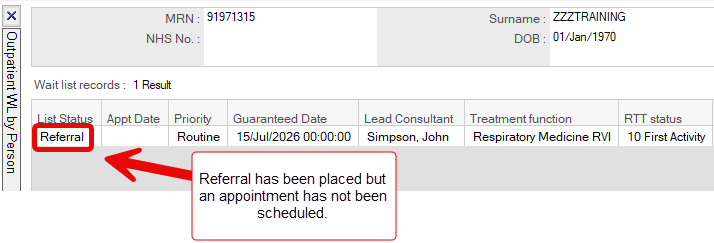
In this example, a referral has already been added to eRecord and an appointment will be scheduled from the Outpatient Waiting List.
Set Up
In this example, I am using the Outpatient Waiting List by Person from the Published Waiting List tab in PM Office. There are other Outpatient Waiting Lists that can be filtered by Consultant/Specialty. You can add these waiting lists to your own Favourites “My Group”; please see the
How To guide to start creating your own “My Groups”.
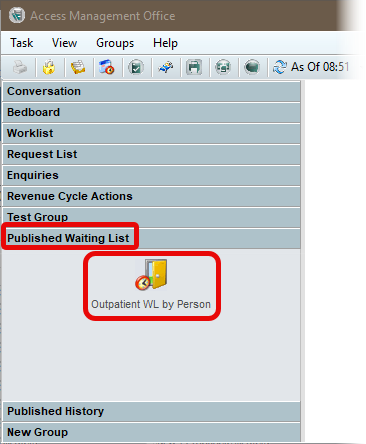
- From the Published Waiting List, select Outpatient Waiting List by Person, then search for the patient using their MRN, NHS number, or initials and date of birth.
- The waiting list displays.
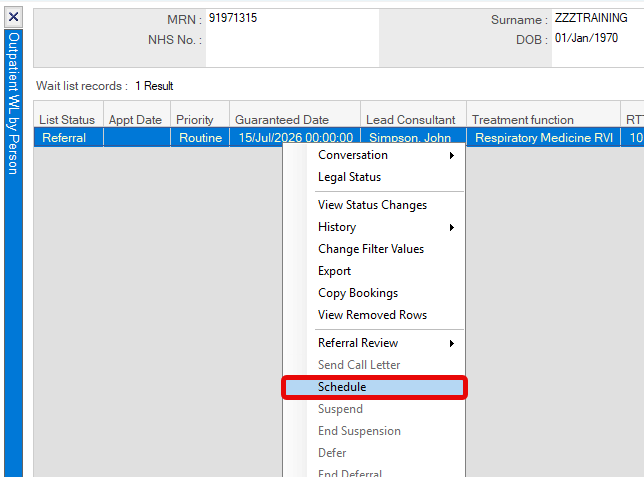
- Right click on the correct line of interest and select Schedule from the menu.
SchapptBook will open with the Appointment Tab displayed. The patient name is already displayed and the encounter has been attached.
- Complete the Appointment Type field by clicking the ellipsis (…) to view all appointment types for your service, make selection and click OK. Note: you can type the first few letters so that you see a filtered list of appointment types.
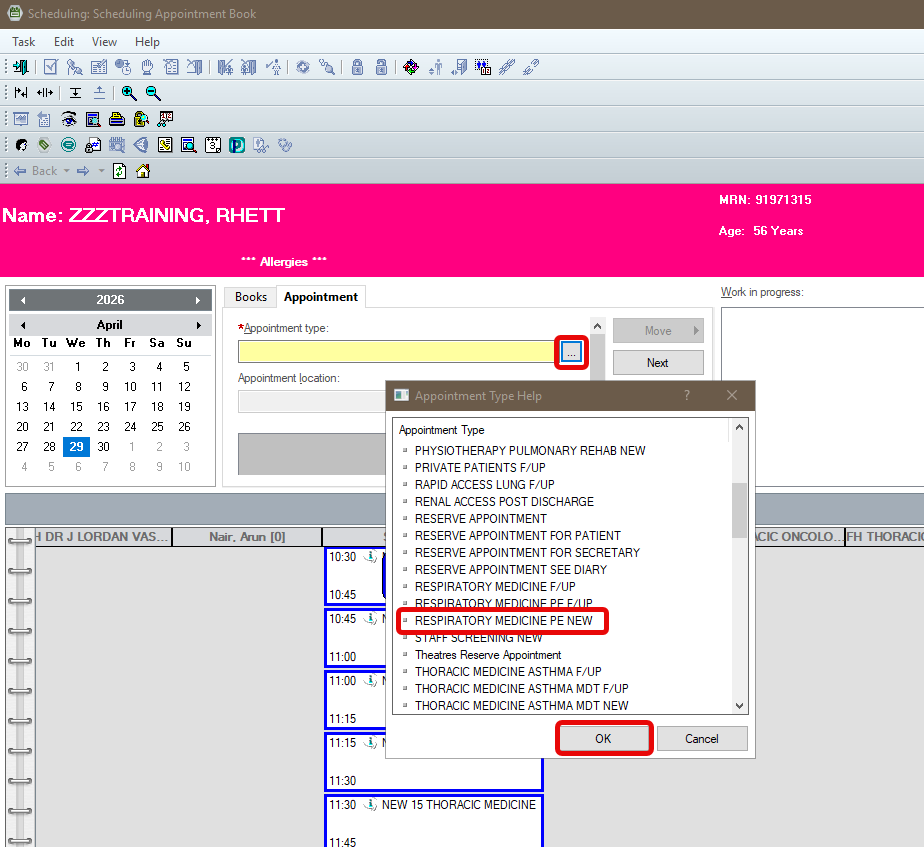
- Clicking the Move button will transfer the appointment details to the Work in Progress section and an appointment date and time can now be given.
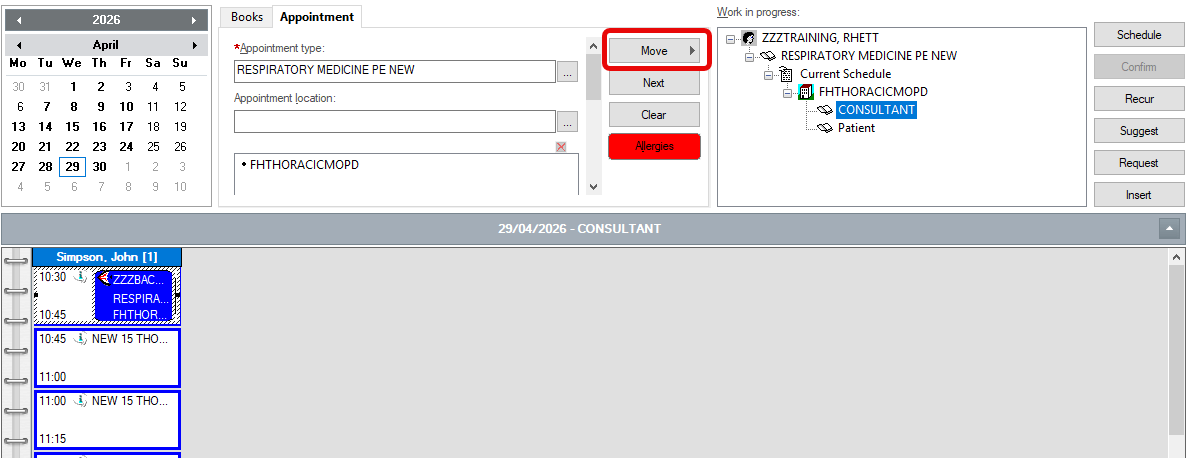
Scheduling the Appointment – Using a New Time Slot
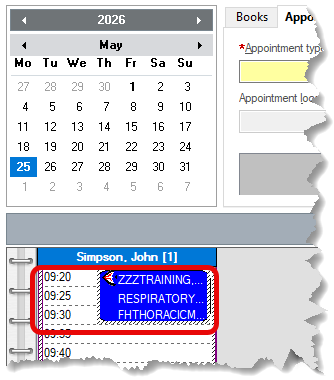
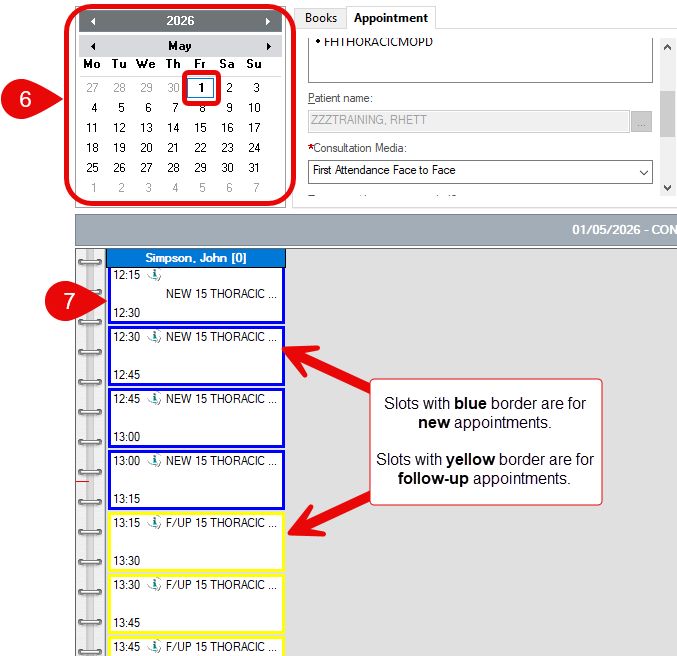
- Locate the date for the appointment using the calendar.
- Select the slot for the correct Resource; New appointment slots have a blue border.
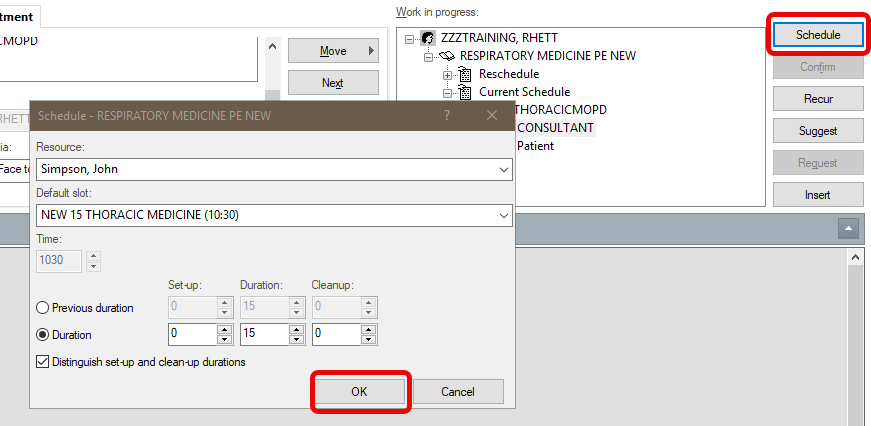
- Selecting the Schedule button will display the clinic details. Click OK.
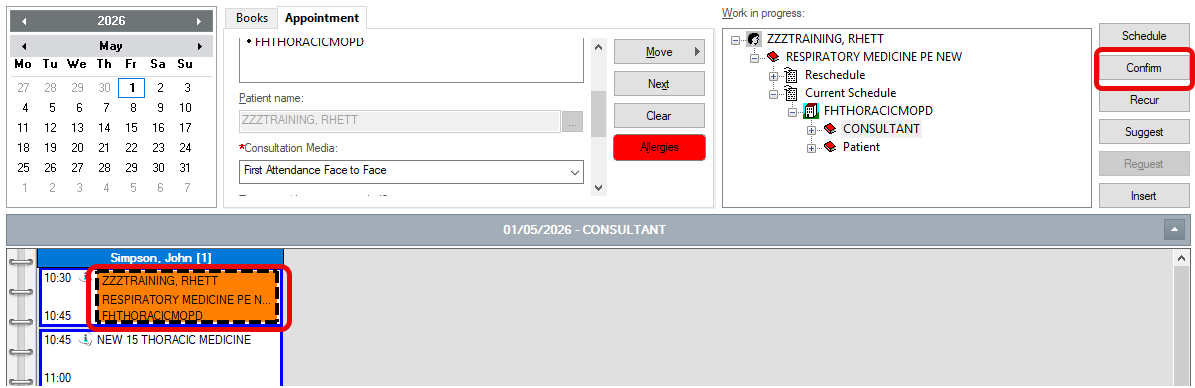
- The Unconfirmed appointment displays against the resource, you must select Confirm to confirm the appointment.
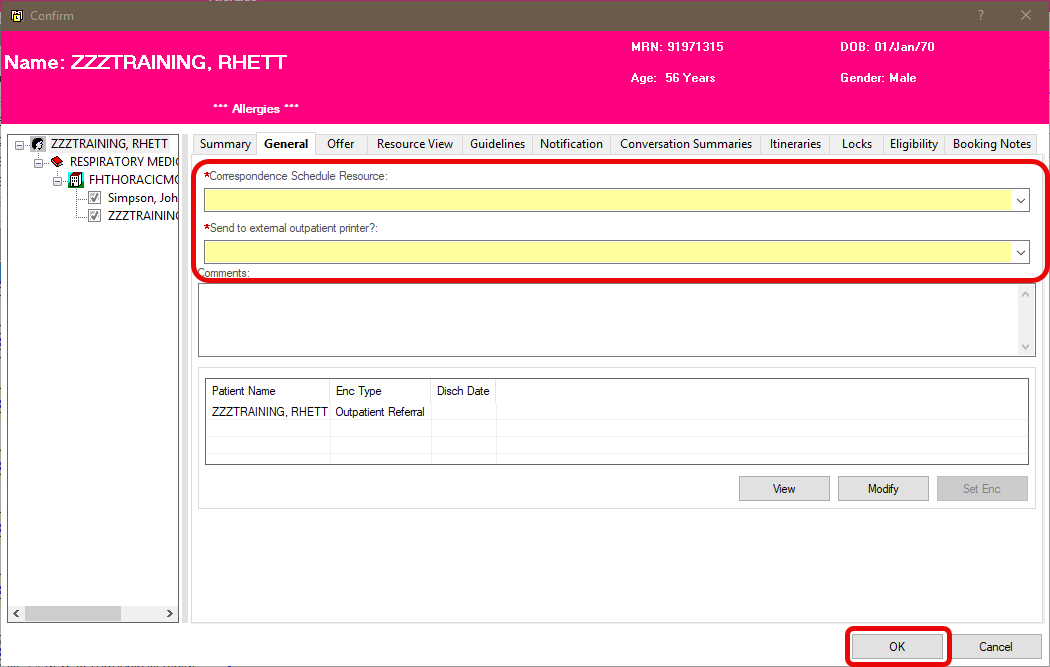
- A confirmation window opens with two mandatory fields. Select the Correspondence Schedule Resource; this will display on the patient letter informing the patient who they will see. Answer the question “Send to external outpatient printer?” as appropriate. Click OK.
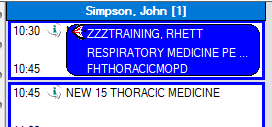
- The appointment will now display as a confirmed (blue) New appointment against the resource.
Scheduling the Appointment – Using Part of a Contiguous Slot
Some clinics have been created using “Contiguous” slots. A contiguous slot is a slot that extends over a long period of time and multiple patients use only a small portion of this slot. For example a clinic which has one slot which spans the whole clinic and patients are booked into a portion of this slot: patient 1 may use 5 minutes of this slot, patient 2 may use 30 minutes and patient 3 may use 10 minutes etc.
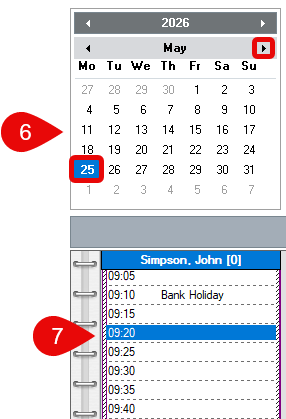
- Locate the date for the appointment using the calendar.
- Select the Start Time for the correct Resource.
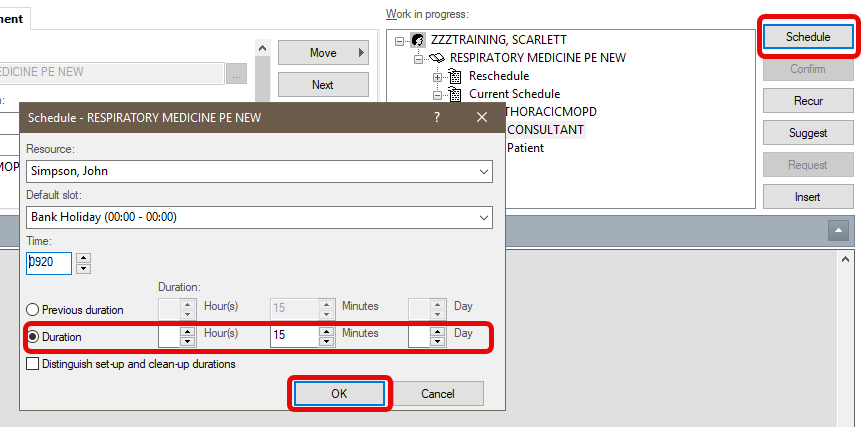
- Selecting the Schedule button will display the clinic details.
- You must adjust the Patient Duration to reflect the minutes that this appointment will be scheduled. If this is not adjusted, this appointment will schedule longer than required!
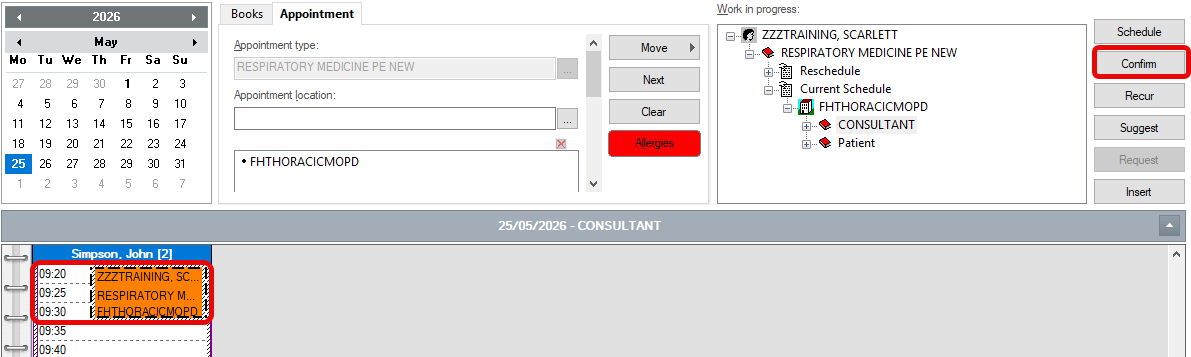
- The Unconfirmed appointment displays against the resource, you must select Confirm to confirm the appointment.
- A confirmation window opens with two mandatory fields. Select the Correspondence Schedule Resource; this will display on the patient letter informing the patient who they will see. Answer the question “Send to external outpatient printer?” as appropriate. Click OK.
- The appointment will now display as a confirmed (blue) New appointment against the resource.