How to Finalise Draft Documents
Scenario
You or a team member has saved a document as a draft and now you want to finalise it.
Instructions
- Within PowerChart, select Draft Documents from the view menu.
- Draft Documents where one or more of these criteria are met will display:
- You created the document
- You are the lead clinician
- You are the signing clinician
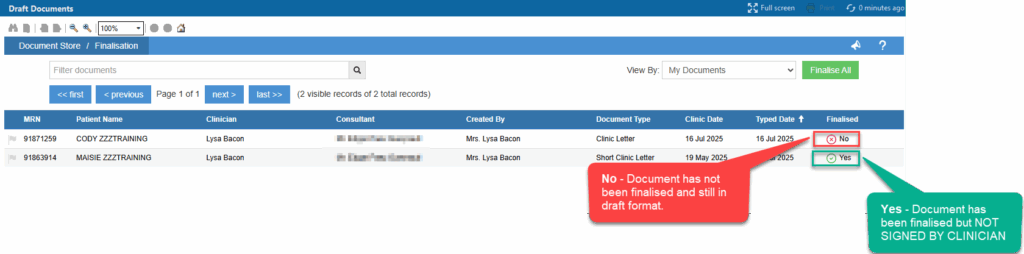
- The Finalised column will display the status of the document:
- Documents that are not finalised it will display an x
- Documents that are finalised but not signed (by the lead/signing clinician) will display a ✓
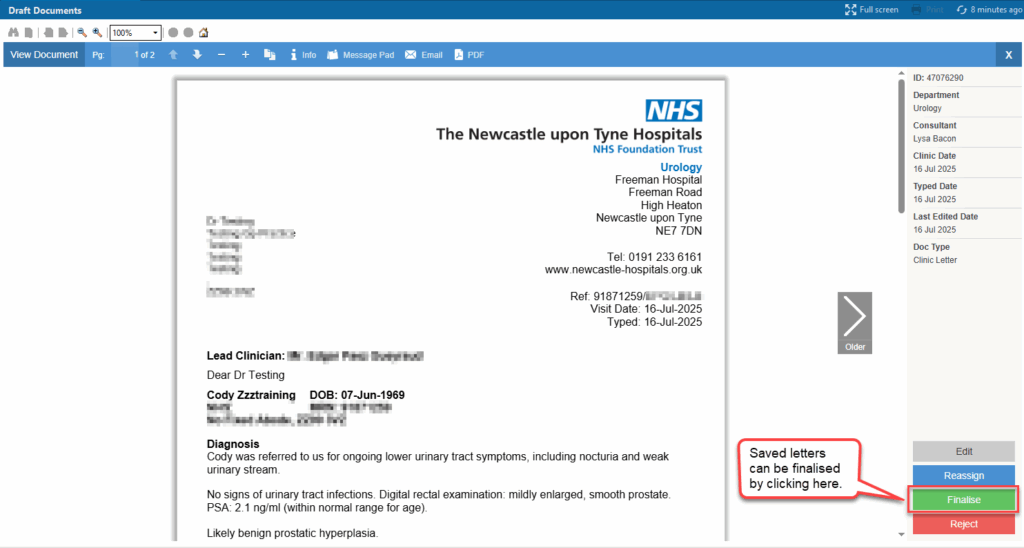
- Select a document in the list. Action buttons display in the bottom right corner:
- Edit – This allows you to make changes to the document. It can then be saved as a draft again or finalised from the Document Creation screen.
- Reassign – This allows you to assign the document to a new owner.
- Finalise – This allows you to finalise the document immediately without making changes.
- Reject – This will reject the document. The document will no longer be viewable in the Draft Documents screen or in the patient record.
- Once the document has been finalised it will move into the Document Signing list for the specified clinician(s).
The document must then be signed by the lead or signing clinician via the Document Signing list before it will be sent to the Document Store Print App.