Checking out a file allows you to make changes to the file and no one else can edit it.
When you finish editing the file, you can then check the file back into the library. Other team members can then edit the file and make changes if they have permission.
If you check out and decide not to make any changes or keep the changes you’ve made, then you have the option of discarding the check out which will not then effect version history.
Check a file out
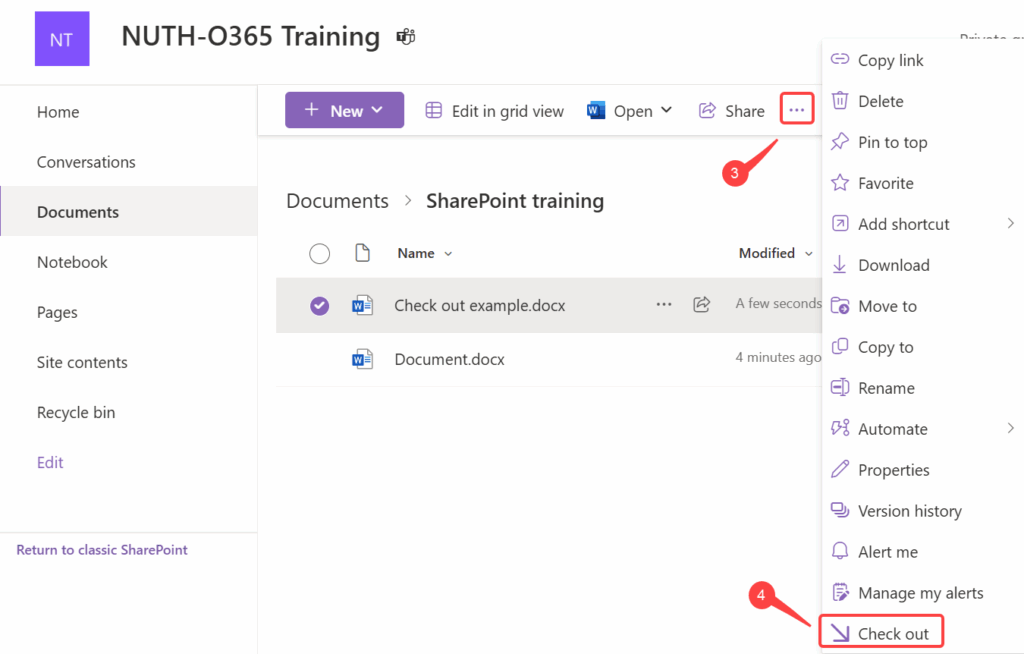
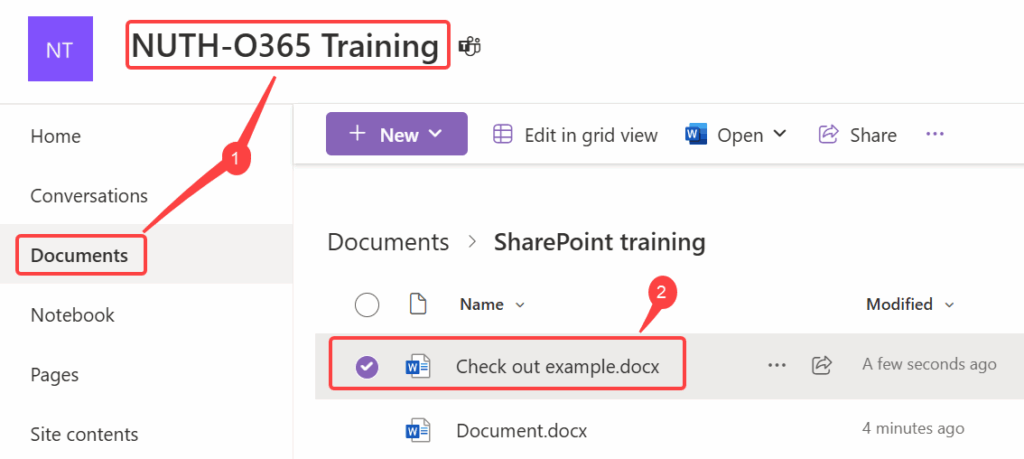
Go to the Team site then click Documents
Select the file you want to edit
Select the More menu
Select Check out
A notification at the bottom of the centre of your screen will tell you an item has been checked out
A small icon will appear to the right – hand side of the file name, informing people the file has been checked out
Check a file in
Go to the Team site then click Documents
Select the file you want to check back in
Select the More menu
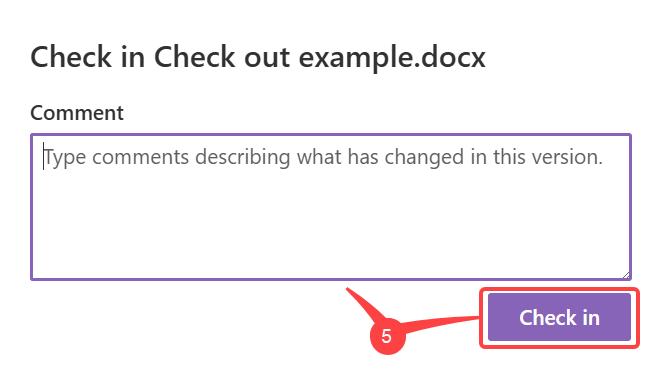
Select Check in – if you don’t want to save changes you’ve made, select Discard Check out
Add a comment highlighting changes made – this is good practice, then select Check in and the small icon will now disappear