How to Reprint Labels for Orders from the Patient Record
Scenario
How to reprint labels from within the Patient Record for orders such as blood tests if the original labels failed to print.
This process should not be confused with the process used to print QR code labels to stick on documents that are sent for scanning.
To see details of the QR code label print process click
here.
Instructions
- In the patient record, select the Collections Enquiry button from the top menu bar.

- The PathNet Collections Enquiry App will now open. It will display a list of orders for the patient.
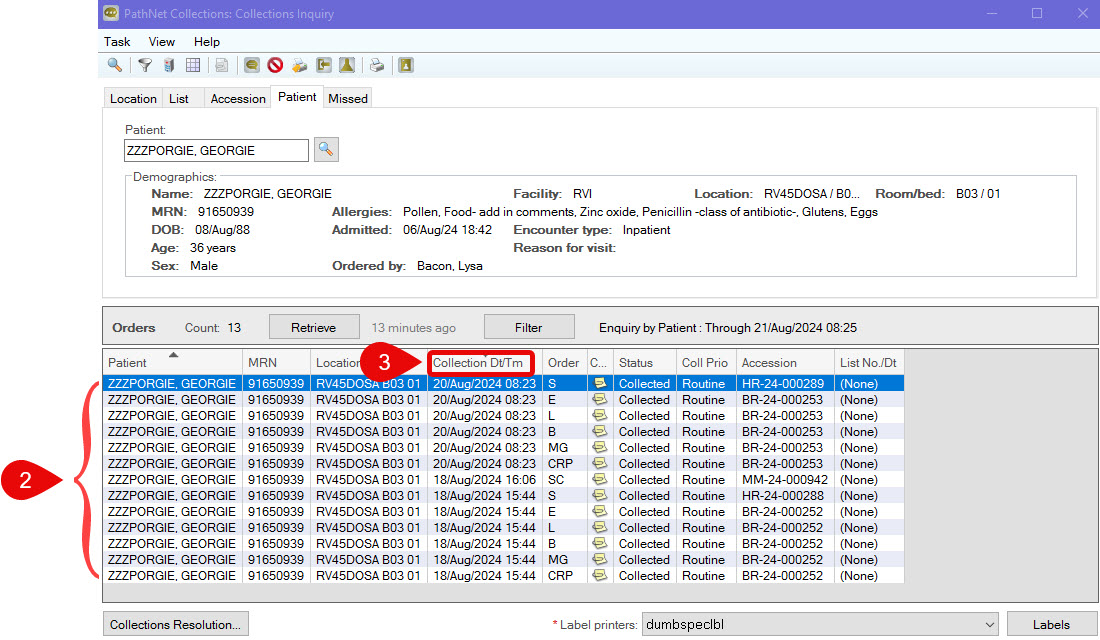
- Sort the list by date by clicking on the Collection Dt/Tm column heading. This will sort the list with most recent being at the top.
If you do not know which labels require reprinting, minimise Collections Enquiry by clicking on the dash icon

in the top right corner and go to
Reprinting a Specific Label; otherwise, please follow the steps below.
Reprinting All Labels from a Specific Date/Time
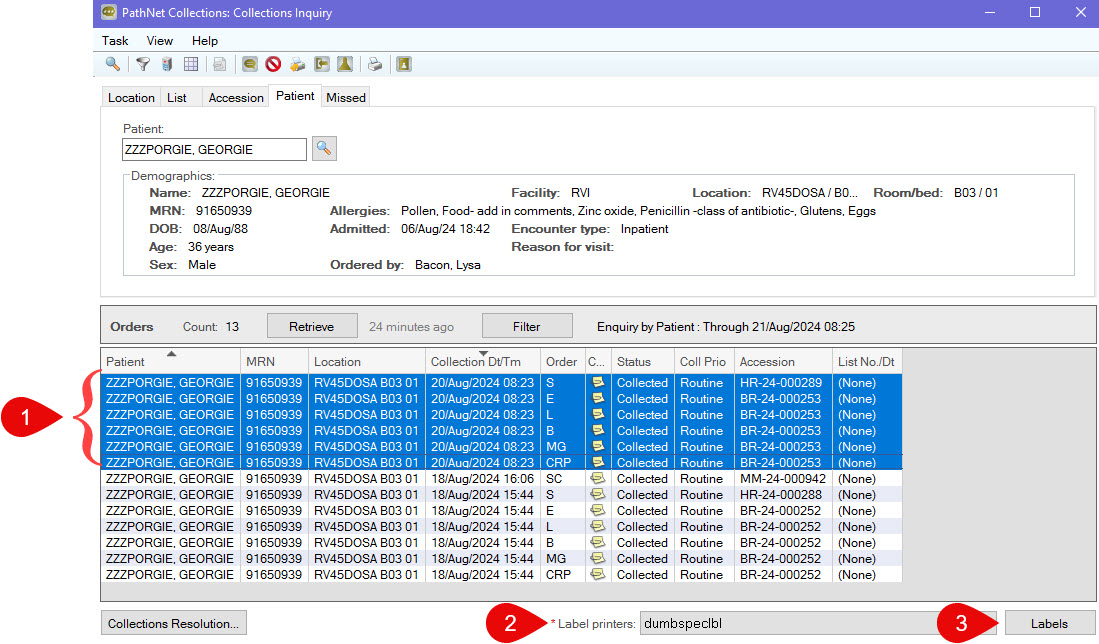
- Click on one of the orders you wish to re-print, hold left mouse and drag to select more than one order in the list. You can also use Right Click to select multiple orders not situated together.
- Click the Label printers button to the bottom right and select the printer you wish to use (each physical printer is labelled with its name). The last printer used will be remembered.
- Click the Labels button to the bottom right.
- In the pop up that appears, check that you are printing All labels for the Selected Orders.
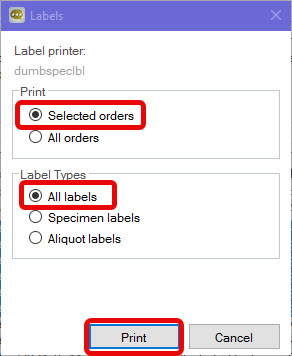
- Click Print.
Reprinting a Specific Label
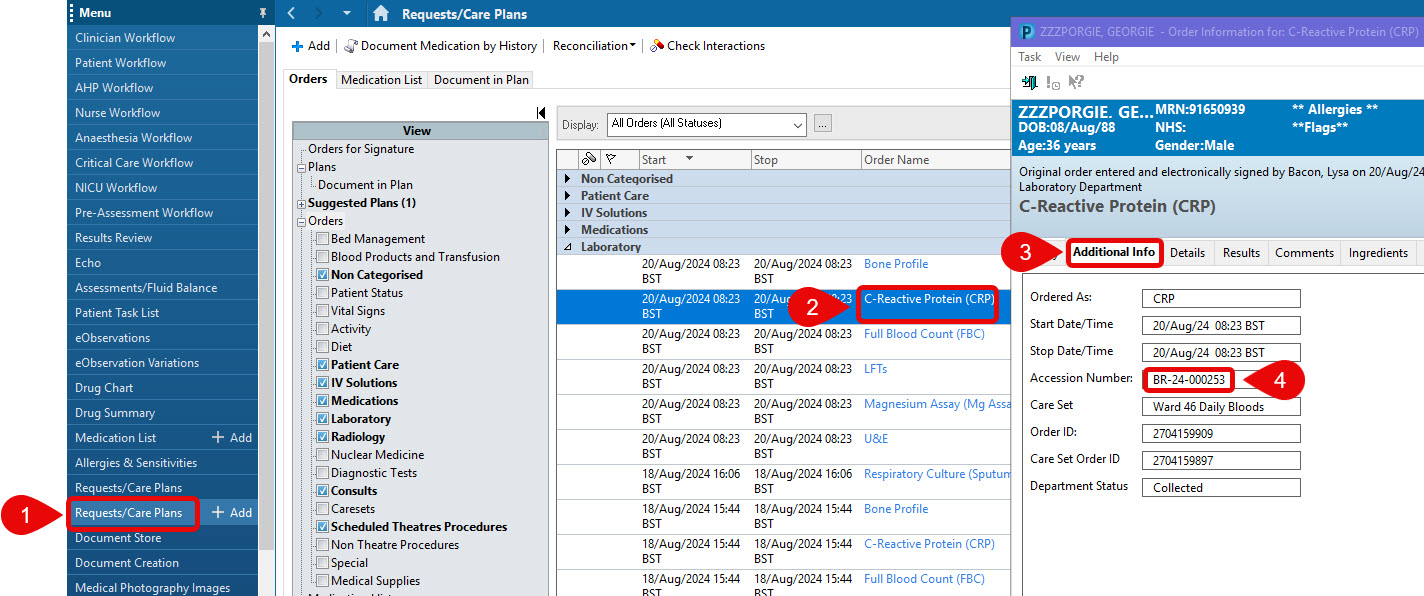
- From within Powerchart, click on Requests/Care Plans.
- Click the name of the order link (in blue) to open the Order Information window.
- In the Information window, click on the Additional Info tab.
- The accession number is now displayed. We will use this number to identify the order/s that need a label reprint in Collections Inquiry.
- Move this window by clicking on the purple banner bar, holding and moving your mouse until the window is positioned on the right side of the screen.
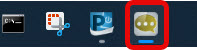
- Reopen the Collections Enquiry window by clicking on its icon on the taskbar at the very bottom of your screen.
- You should have both Order Information and Collections Inquiry windows open. Reposition a window if you need to so that you can clearly see both the Accession number in Order Information and the list of orders to choose from in Collections Inquiry by visual search.
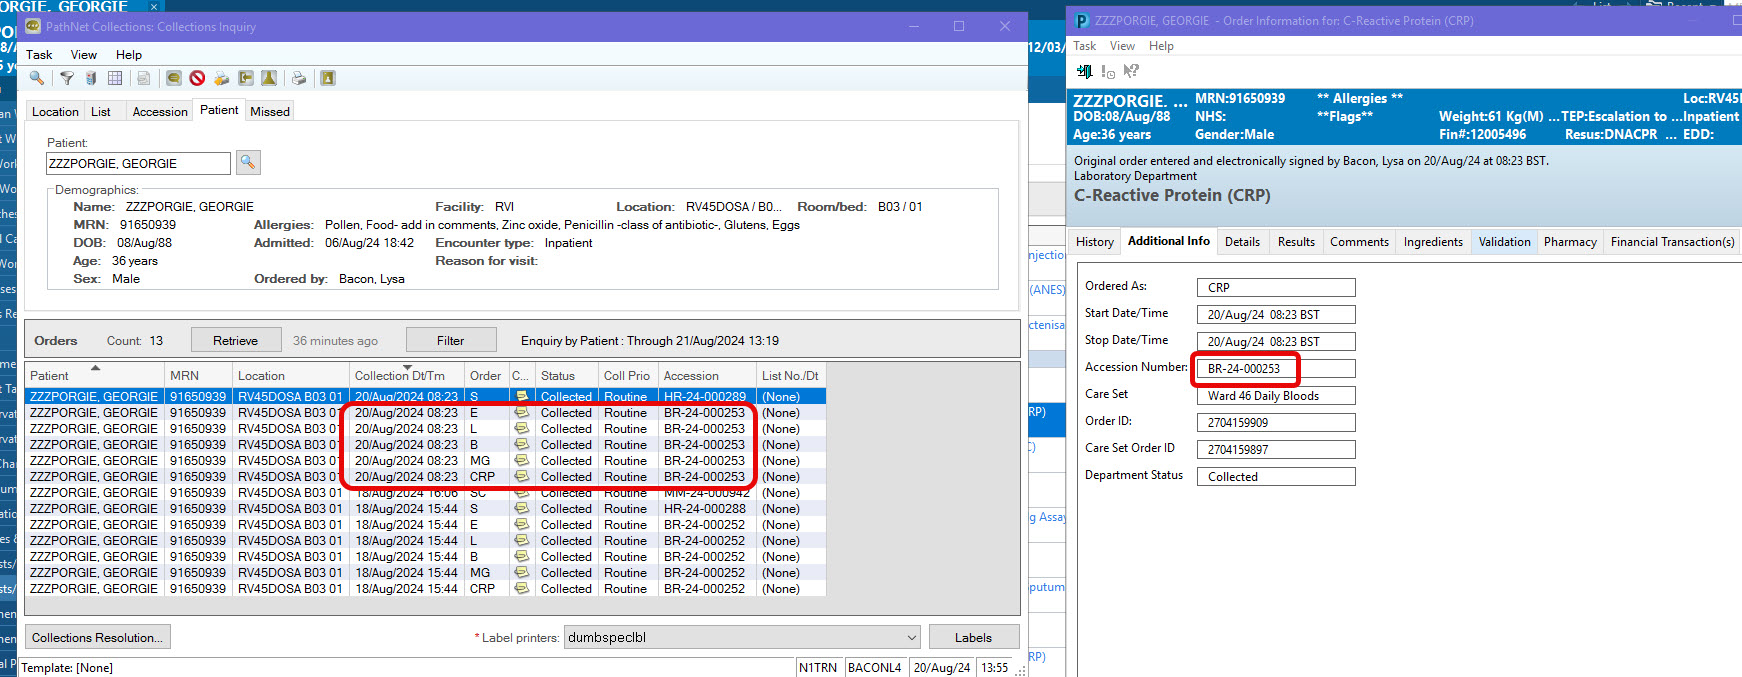
Please note, in this example the accession number is found associated with multiple (5) tests. This is because the system will process multiple order requests from a single sample where the tube type and request date/time are the same. As such, only one label will print for these 5 orders because there is only one sample involved.
- There is an alternative to the previous step which involved a visual search for orders with matching Accession number.
- Perform previous step of aligning the Order Information and Collections Inquiry windows.

- Click on Accession tab in Collections Inquiry window.
- Type the accession number of the order you wish to reprint into the Starting Accession field and press enter.
- List of orders matching that Accession number will now display.
- To print, click the Label printers button to the bottom right and select the printer you wish to use (each physical printer is labelled with its name). The last printer used will be remembered.
- Click the Labels button to the bottom right.
- In the pop up that appears, check that you are printing All labels for the Selected Orders.
- Click Print.