Adding a patient to a TCI Waiting List – Non Theatre
Scenario/Information
If a patient is required to come into the Trust for a day case or inpatient stay, they will need to be added to a TCI list from which they will be admitted when they arrive on the ward/dept
Instruction
- Open SchApptBook
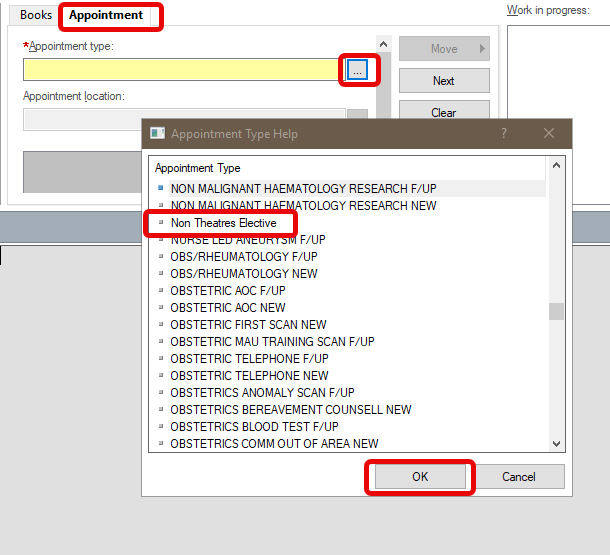
- Select the Appointment tab
- Search for and select the Appointment Type (tip: type “non” to select Non Theatres Elective)
- Appointment Location – select the hospital site where the patient will arrive
- Patient Name – click the ellipsis (…) to search for your patient by MRN or NHS Number (if this is not known, use initials and DOB to locate the correct patient)
- Once the Patient Search results display, check the top part of the screen to confirm you have located the correct patient.
- Select Add Encounter
- Select Yes to the pop up – Is this a Waiting list encounter?
- Select Inpatient Waiting List from the Available Conversations pop up, click OK
- The patients’ pathway information will display – select the correct pathway, click OK – If there is no pathway for this encounter, right click and select Add Episode, then select the newly created encounter
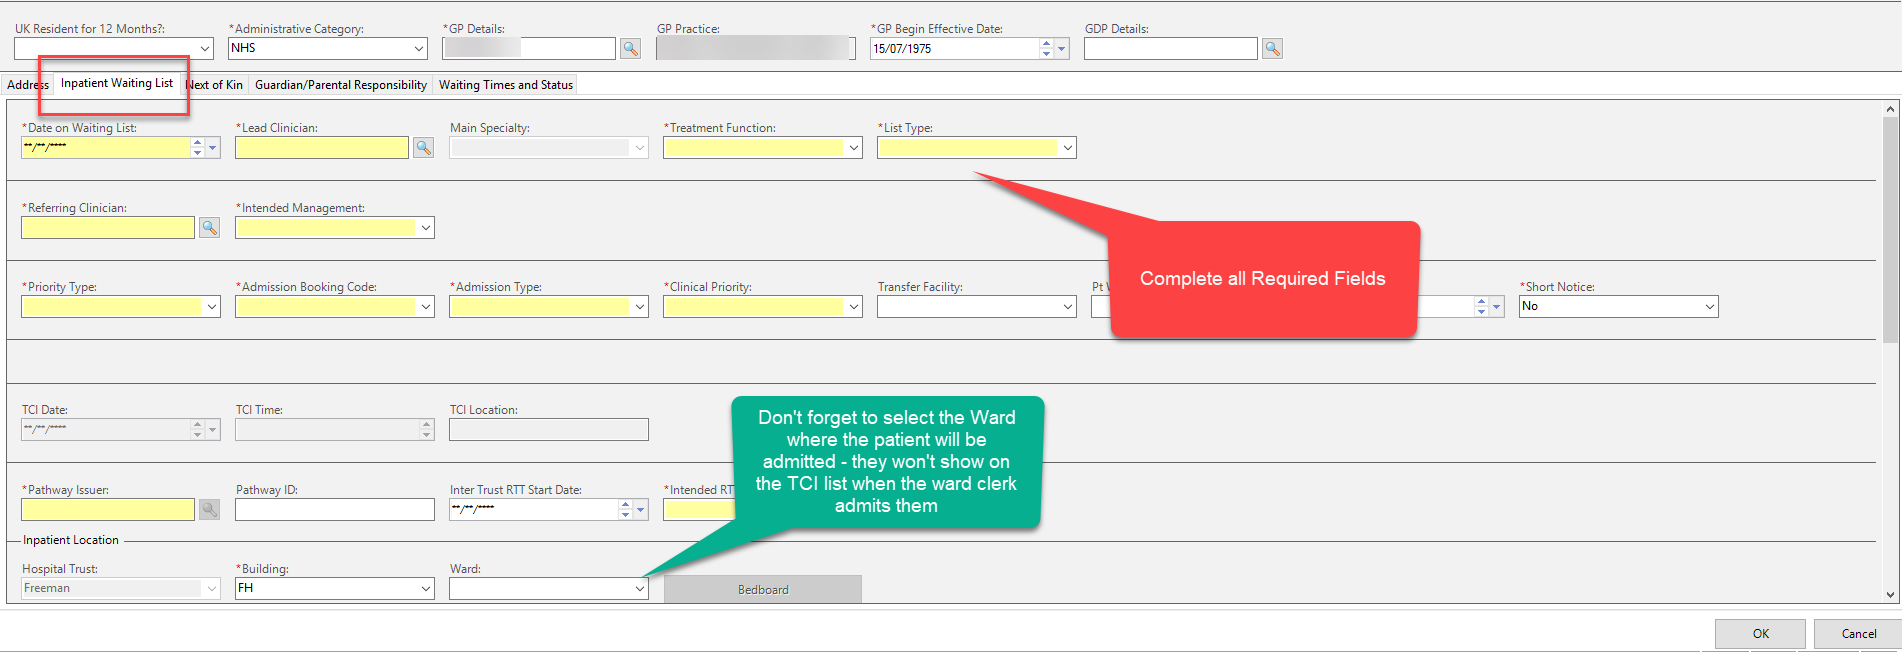
The Inpatient Waiting List form displays
- Ensure the yellow required fields are switched on (right click in a grey space and select Highlight Required fields – first time use only) and complete any required information from the patient demographic page
- Open the Inpatient Waiting List tab
- Complete the Date on Waiting List (tip: type the letter T to use todays’ date)
- Complete all other required fields
- Complete the Ward that the patient will be admitted to – if this is not selected, the patient will not display on the TCI list for the Ward Clerk when the patient arrives (you do not need to locate a bay or bed)
- Click OK
Once the relevant information has been completed on the Waiting List form, the system will return to SchApptBook where the remaining fields would be completed
- Select the Lead Clinician (this should be the same Lead Clinician previously completed on the Inpatient Waiting List form)
- Add any Additional Comments
- Click the Move button

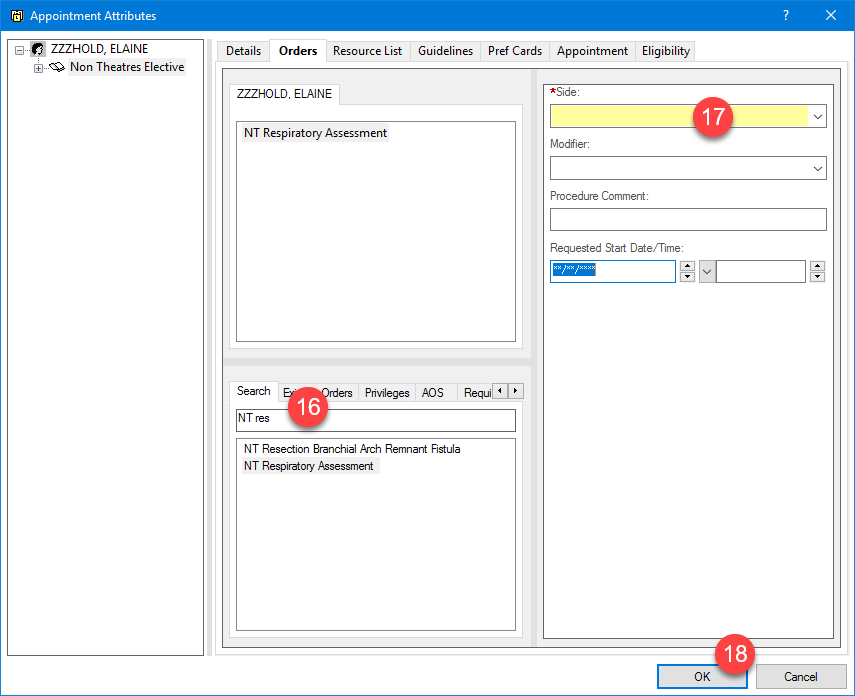
- The Appointment Attributes dialog will open. In the lower portion of the screen, search for and select the procedure being performed (Non Theatre Orders start with “NT”)
When searching for Non Theatre Orders, type the letters “NT” followed by the first few initials of the order
- Complete any required fields (check the pre-populated information is correct and amend if necessary)
- Click OK
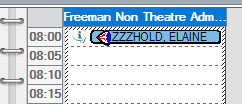
19. The Non Theatres diary will now display
a. Select the appropriate date for the admission
b. Select the Non Theatre appointment time
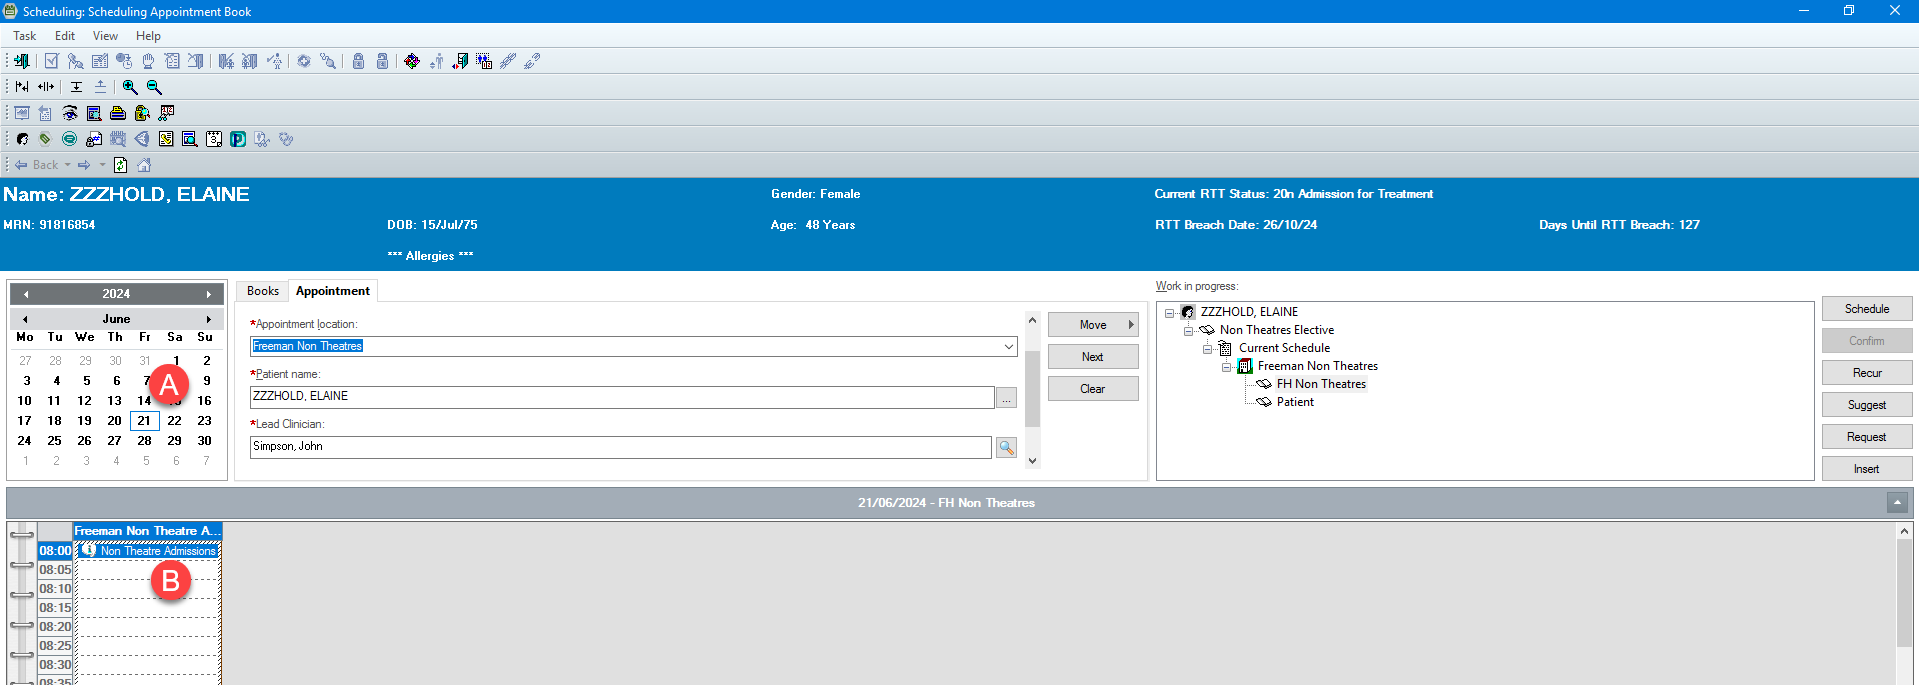
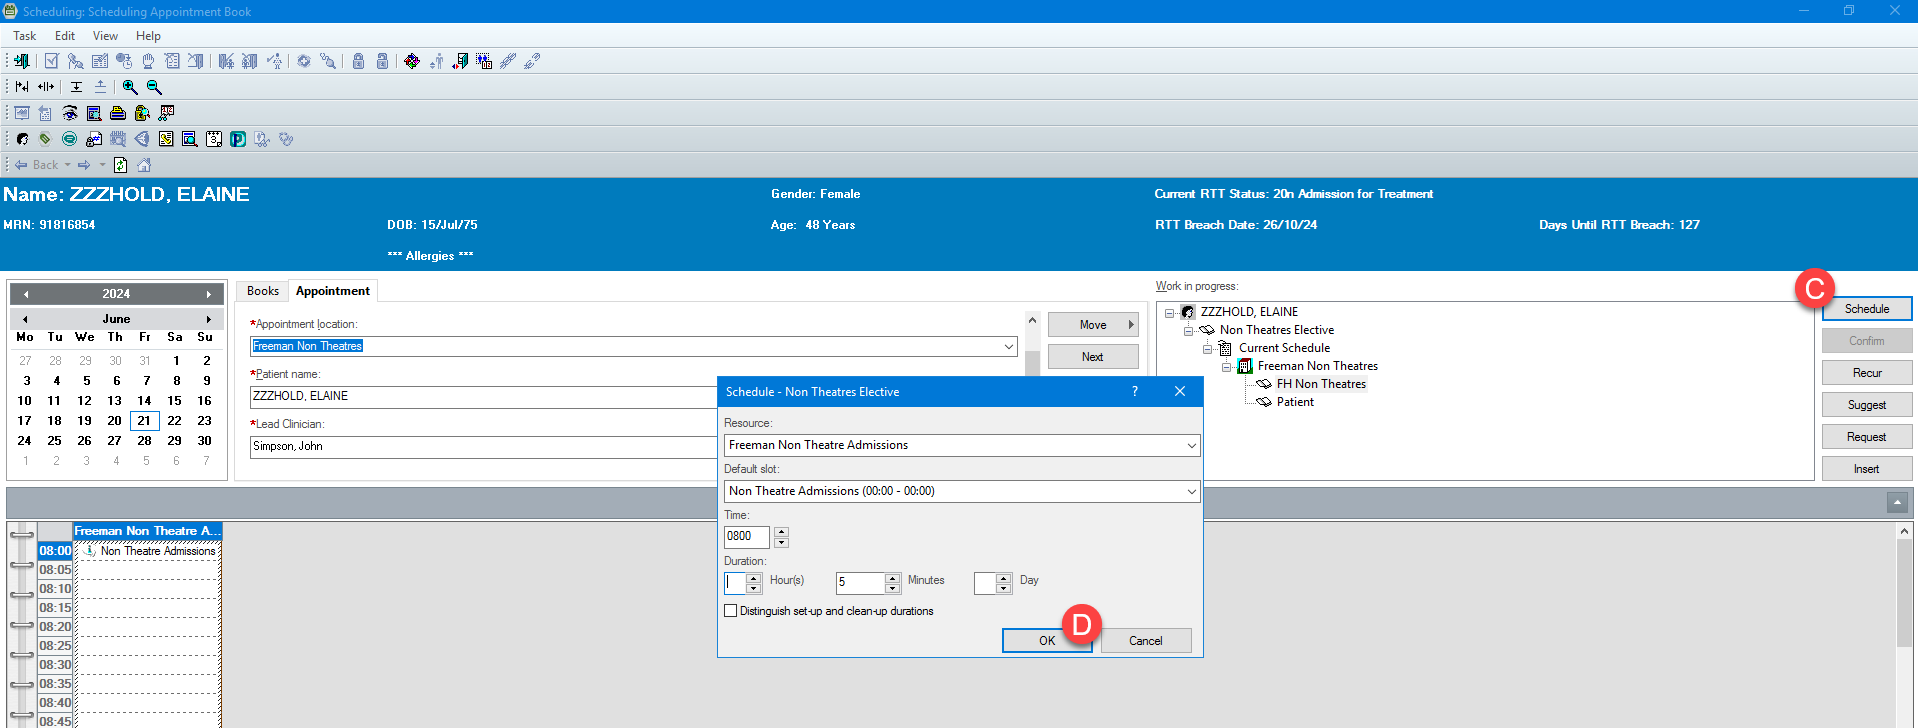
c. Click the Schedule button
d. Check the Non Theatres Elective Schedule Information is correct and click OK
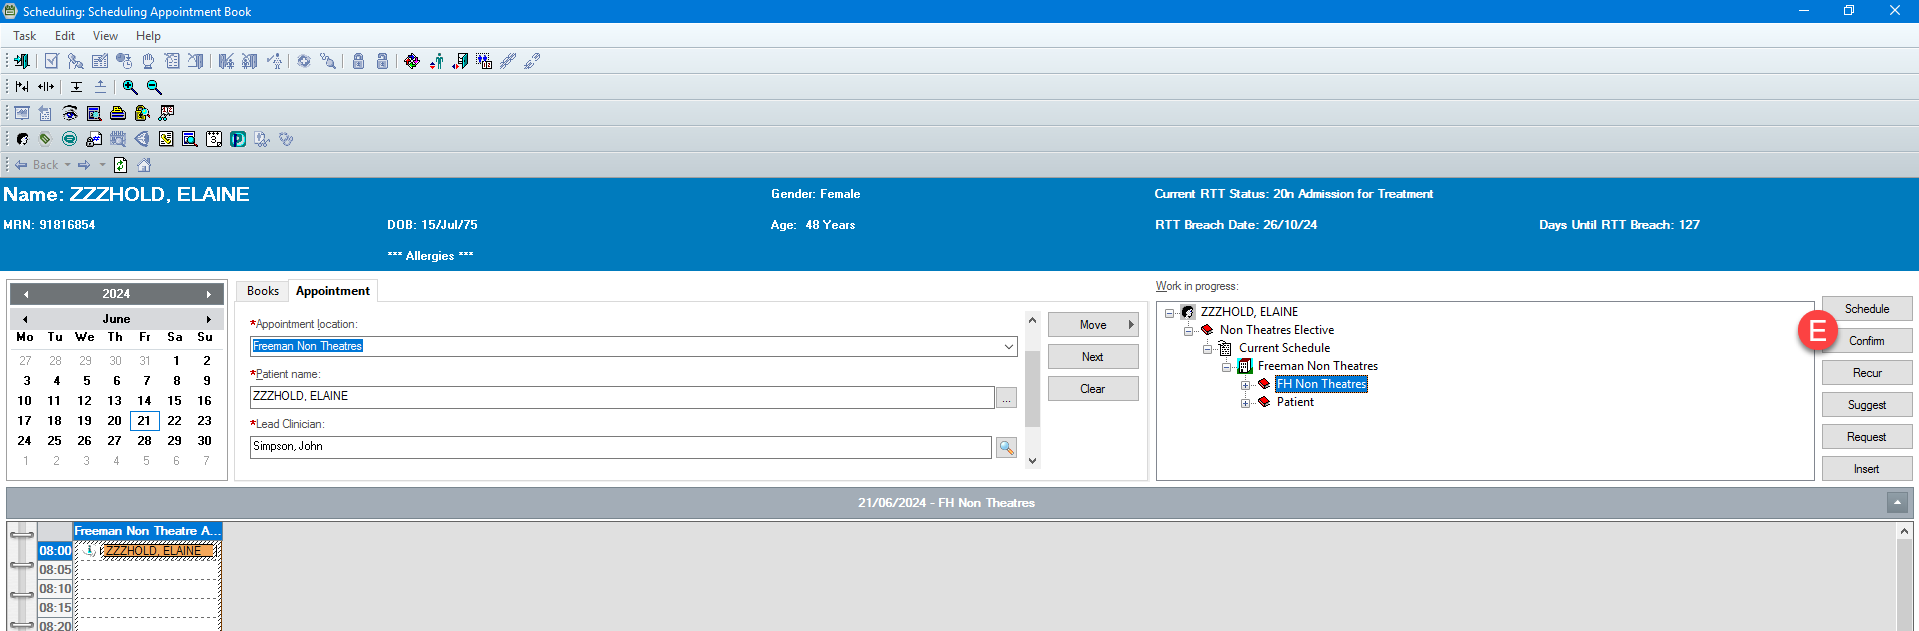
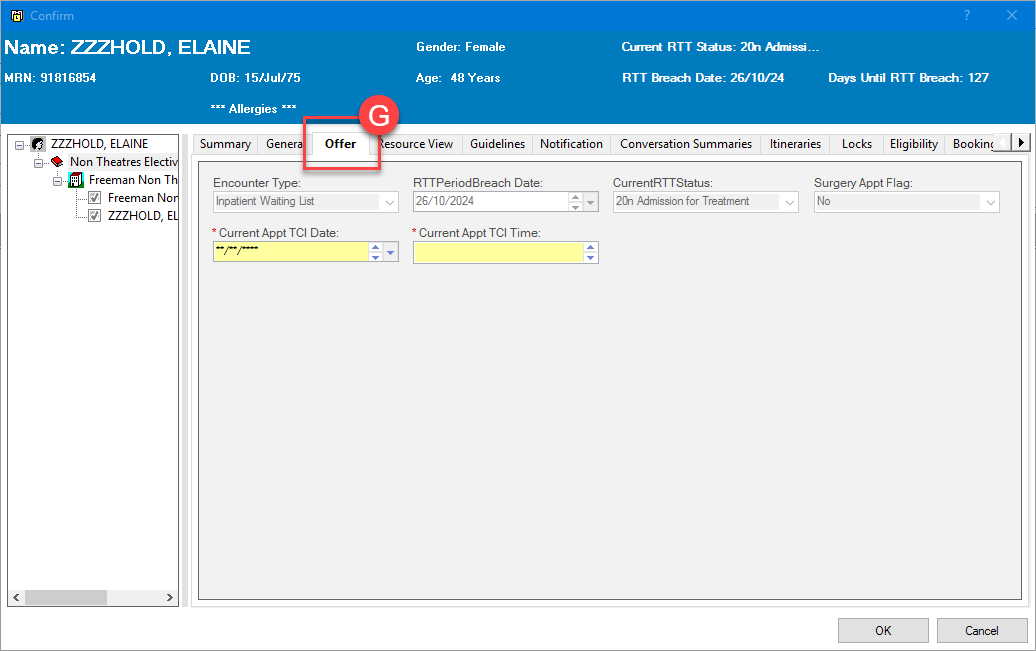
e. Click the Confirm button
f. Enter the location where the patient is to arrive for their appointment
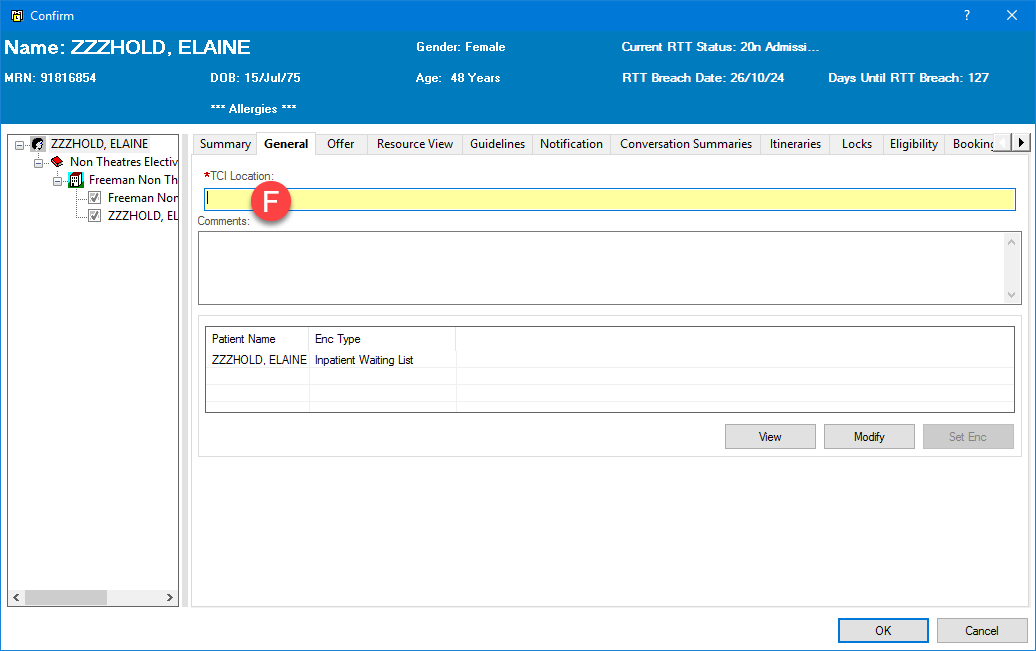
g. Click the Offer Tab and enter the date and time the patient is to arrive for their appointment, click OK
20. The schedule Non Theatre Elective appointment is now confirmed