More results...
More results...
The following guide will show you all the features and benefits of using Appointments. From a basic overview of the appointment ledger screen, booking appointments, marking the outcome of an appointment, cancelling appointments and much, much more.
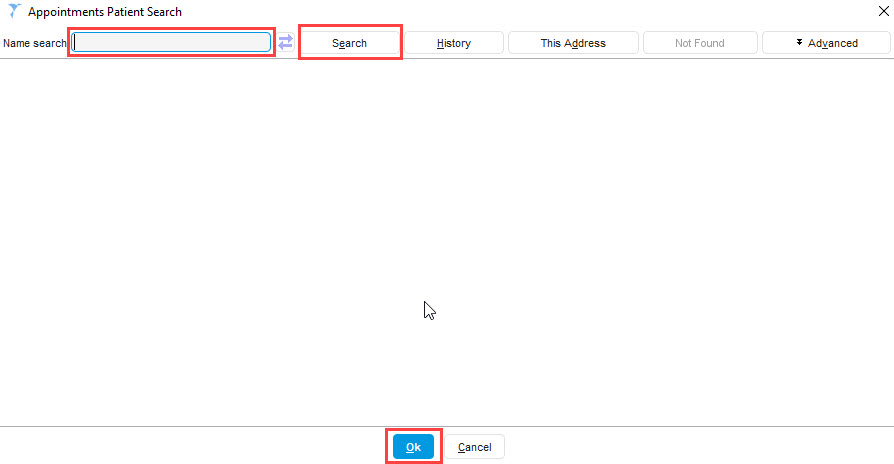
Open SystmOne and select appointments button
![]()
The Appointment Ledge Screen will now Open
On the ledger, Right click on the required appointment slot. A list of options will appear:
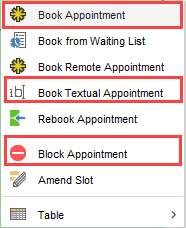
Booking a prearranged appointment
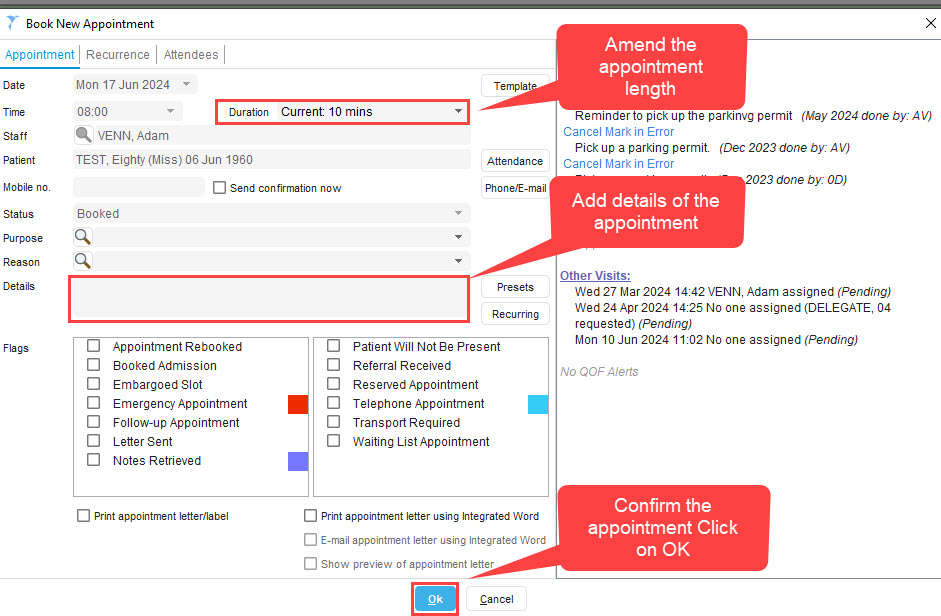
The book new appointment screen will appear.
The book new appointment screen will appear
Note: There might be a prompt to ask if the appointment is for Waiting list. Please select accordingly.
Patient Attended/Visited:
Right click on the appointment slot, click on Consultation this will access the patients record to write up patient notes after visit has taken place. It will also automatically update the appointment slot to finished once the patients record is saved.
Patient DNA/NO Access Visit: Right click on the appointment slot, navigate to Administration and click on the relevant option
Did Not Attend – for DNA to clinic appointment
No Access Visit – for failed home contact.
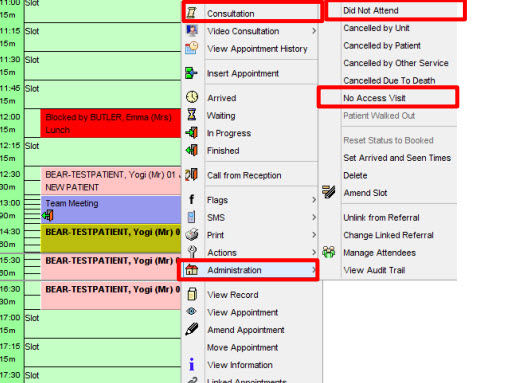
When a patient is marked as Did Not Attend or No Access and was previously on a
waiting list the following prompt will appear Click Yes to add back to Waiting List
All cancelled appointments must be cancelled from the appointment ledger before the end of
the day prior to the appointment using the Cancelled options.
Right Click on the appointment slot, navigate to Administration and click on the relevant option
• Cancelled by Unit
• Cancelled by Patient
• Cancelled by Other Service
• Cancelled due to death
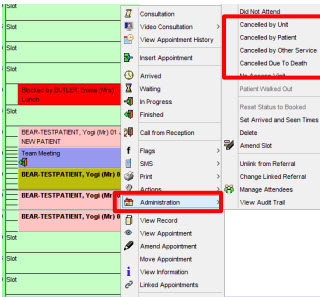
NOTE: A prompt will appear Never Click Rebook Later or Rebook Now
Don’t Rebook is chosen – this will cancel the appointment and remove the
appointment from the slot. If the patient was previously on a waiting list, the following
prompt will appear > Click Yes to add back to Waiting List
Right click on the required appointment slot, Select Textual Appointment, the book new appointment screen will appear
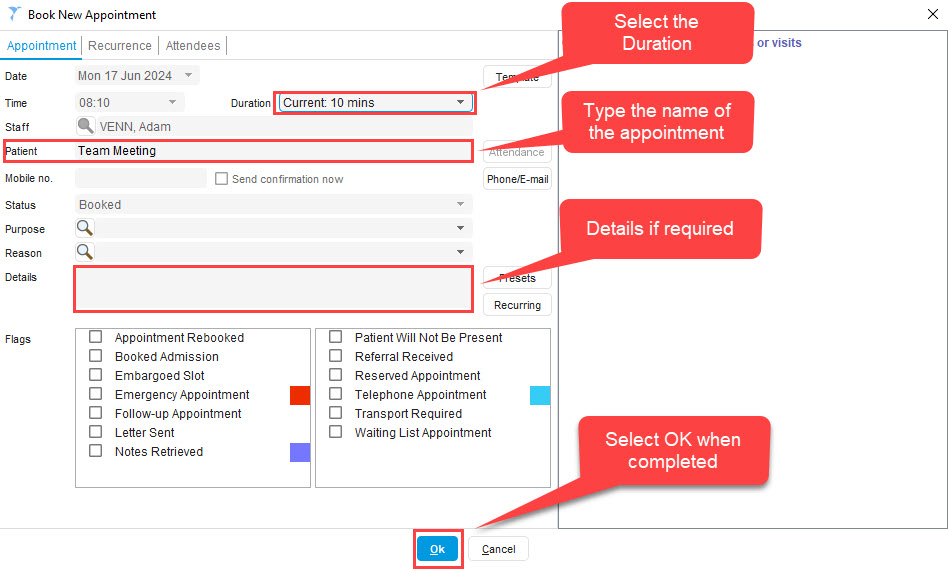
NOTE: Once the meeting or training is completed please Right Click and select Finished
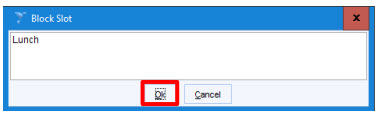
Blocking Slots
Right click on the required appointment slot, Select Block appointment. The Block slotscreen will appear. Type the reason why the slot is blocked. Click Ok.
Again fill out all the details as per the same as Textual Appointment
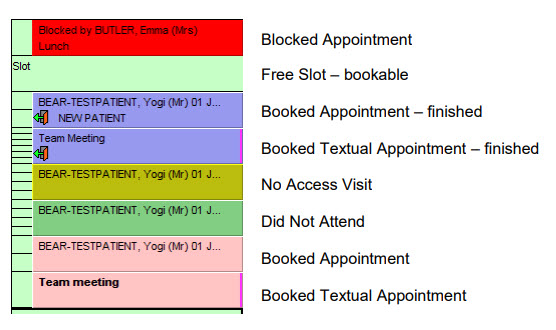
Appointment Ledger Key