The Scheduling Appointment Book allows you to schedule, cancel, reschedule appointments, modify patient and appointment information, Check-In and Out etc.
This guide will explain how to set up your preferences, including setting up the patient demographic banner bar to view allergies. This information will help you to display the information you need and to minimise errors.
Setting Display Options
Open SchApptBook
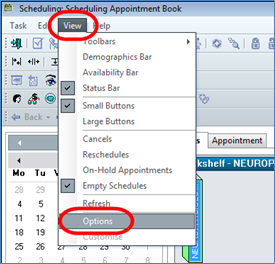
Select View from the toolbar
Choose Options from the menu
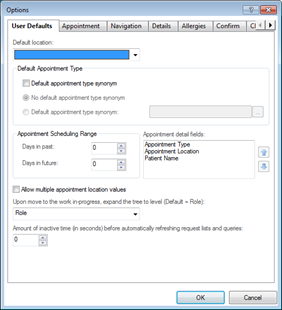
The options menu will allow you to set up some defaults including:
Default location, appointment Type, time frame etc
Appointment preferences
To set your appointment book defaults
The following screen shots show the settings you should select for our Trust
Click on the Appointment tab and select the following options. Deselect any options that are not displayed below.
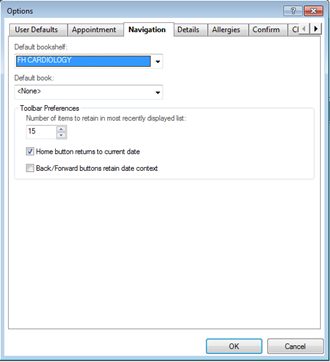
Click on the Navigation tab and use the dropdown to select the Default Bookshelf.
The bookshelf will now default to the selected option each time you open SchApptBook – you will need to close and re-open SchApptBook for the bookshelf to display.
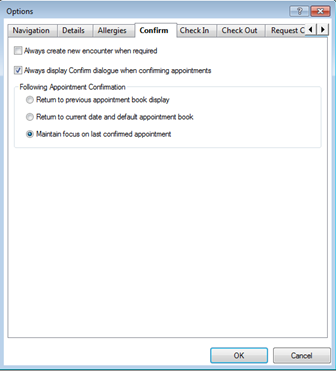
Click on the Confirm tab and select the following options. Deselect any options that are not displayed below.
Click OK
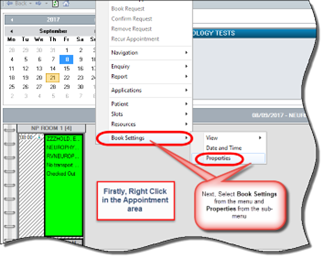
Next, you will need to set the preferences in your Book Settings.
Right click in the Appointment area and select Book Settings and Properties
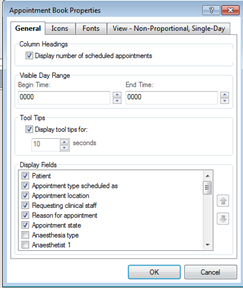
On the General tab, tick the “Display number of scheduled appointments” tick box
Click on the Icon tab and select the icons ticked below
Click OK
Your preferences should now have been saved
Adding the Post Document Tab
Instruction
To print patient or GP letters associated with appointments, you will need to add the Post Documents Tab.
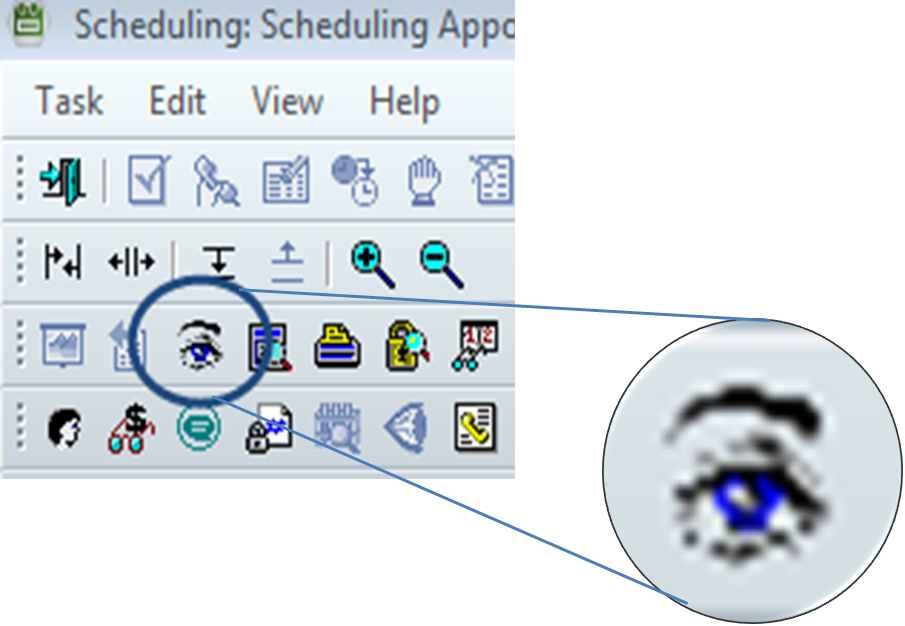
Open SchApptBook and select the Eye Enquiry icon
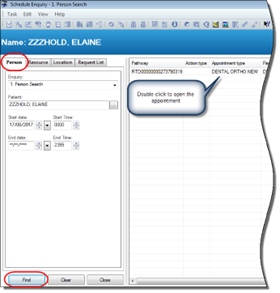
Using the “Person” tab, locate the patient and appointment that requires a letter to be printed. You may need to adjust the Start Date to a date in the past
Double-click to open a patient appointment
Right click in the “white space” of the Appointment View window, and select Preferences
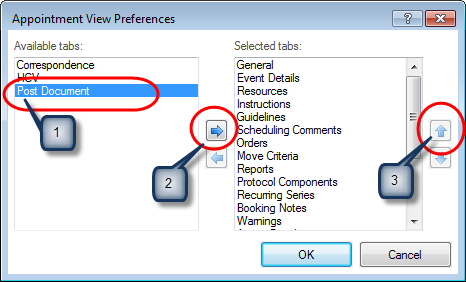
Select Post Document from the Available Tab list on the left window (1)
Use the arrow key in the middle to move this into the Selected Tabs list (2)
Use the upward arrow on the right to move it the top so it becomes the first available tab (3) (NOTE: Other tabs can be reordered such as Event Details, Event History and Scheduling Comments)
Click OK
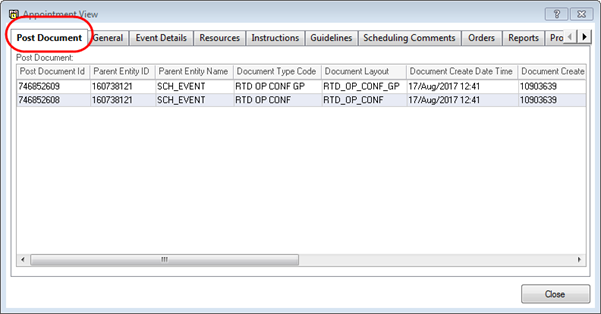
The Post Document Tab is now available and displayed as the first tab
Demographic Banner Bar
Instruction
The following SchApptBook preferences should be set in order to view the patient demographic bar to view Allergy information for a patient
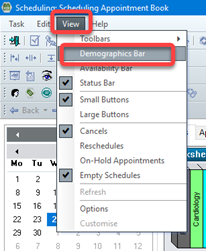
Select View from the toolbar
Choose Demographics Bar from the menu
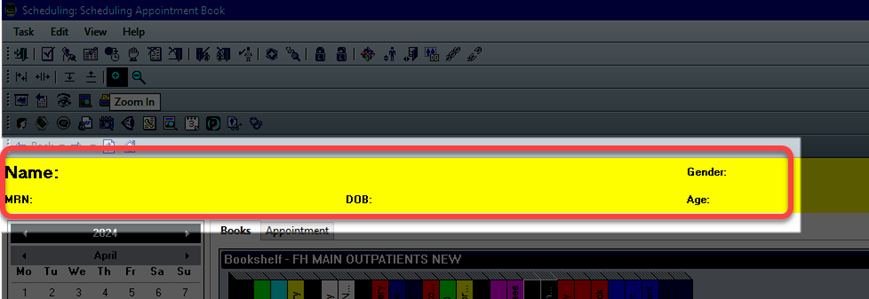
The Demographics bar will display
Customising the Demographics Banner bar
Once the banner bar is displayed, further options can be included such as Allergies.
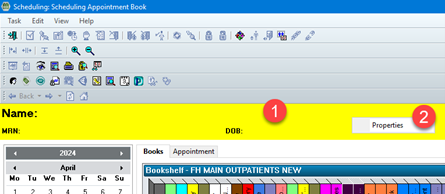
Right click anywhere within the Demographics Banner bar
Select Properties
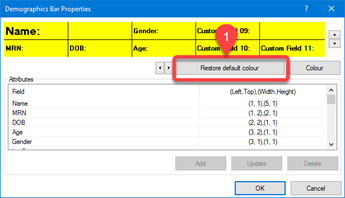
The Demographics Bar Properties box will display allowing you to customise where you would like things to appear within the demographics banner bar.
To customise, if your banner bar is not blue, please select Restore default colour
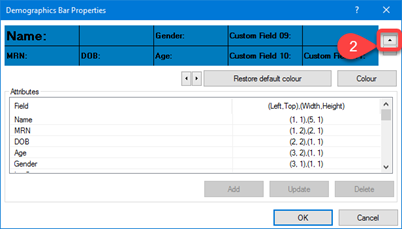
Further rows may need to be added, to add an extra row (if needed) select the up arrow button to the right – a maximum of 3 rows
It’s recommended to add a maximum of three rows to the Demographics Banner Bar as this may impact the loading of SchApptBook
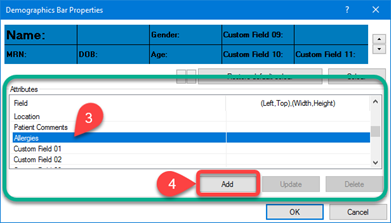
To add your specific attribute e.g. Allergies:
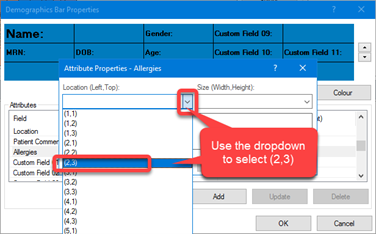
Select the Allergies option within the attributes field and click Add – the Attribute Properties will display
In the Attribute Properties dialog, select where you would like the item to display on the banner bar. It is recommended to display Allergies as Location – Column 2 and Row 3, select (2,3) from the dropdown, Size – Text size recommended will default to (1,1)
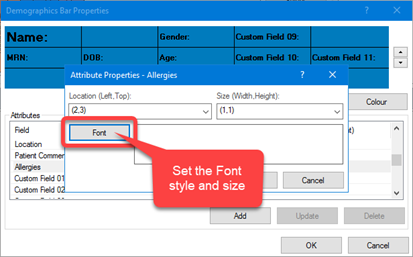
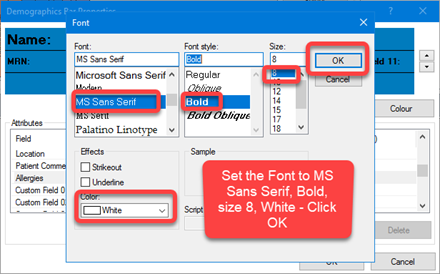
It is also recommended to update the font style and size using the Fontbutton – select a style of MS Sans Serif, Boldsize8 and Colour White (note items already displaying on the banner can have font colour changed to white if necessary by selecting them from the attributes and using the Update button to change)
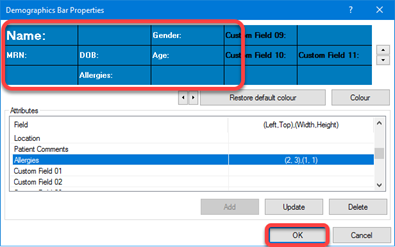
Once all properties have been set, click OK
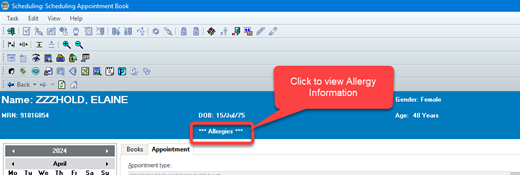
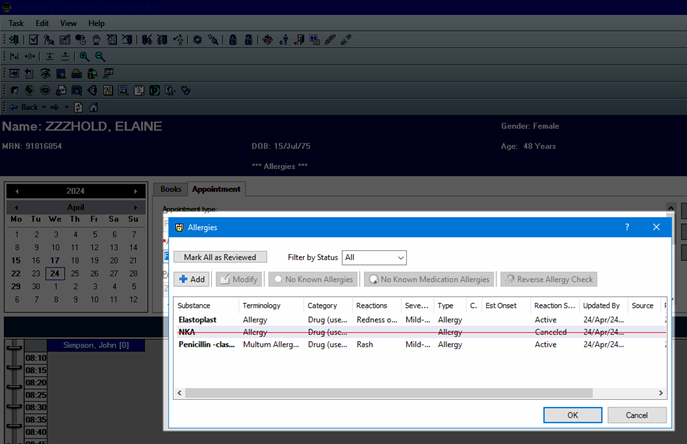
Once a patient has been selected through the Scheduling process, the banner will populate with the specific patient information along with the Allergies option that has now been added. To view allergy information click ***Allergies*** on the patient demograhic banner bar