Document Store Overview
Document store is accessed from within a patient’s record by clicking on the Document Store tab in the vertical blue menu on the left side of the record.
Draft and Signed documentation is held here in addition to images of scanned paper documentation.
For a detailed Document Store guide, please click here.
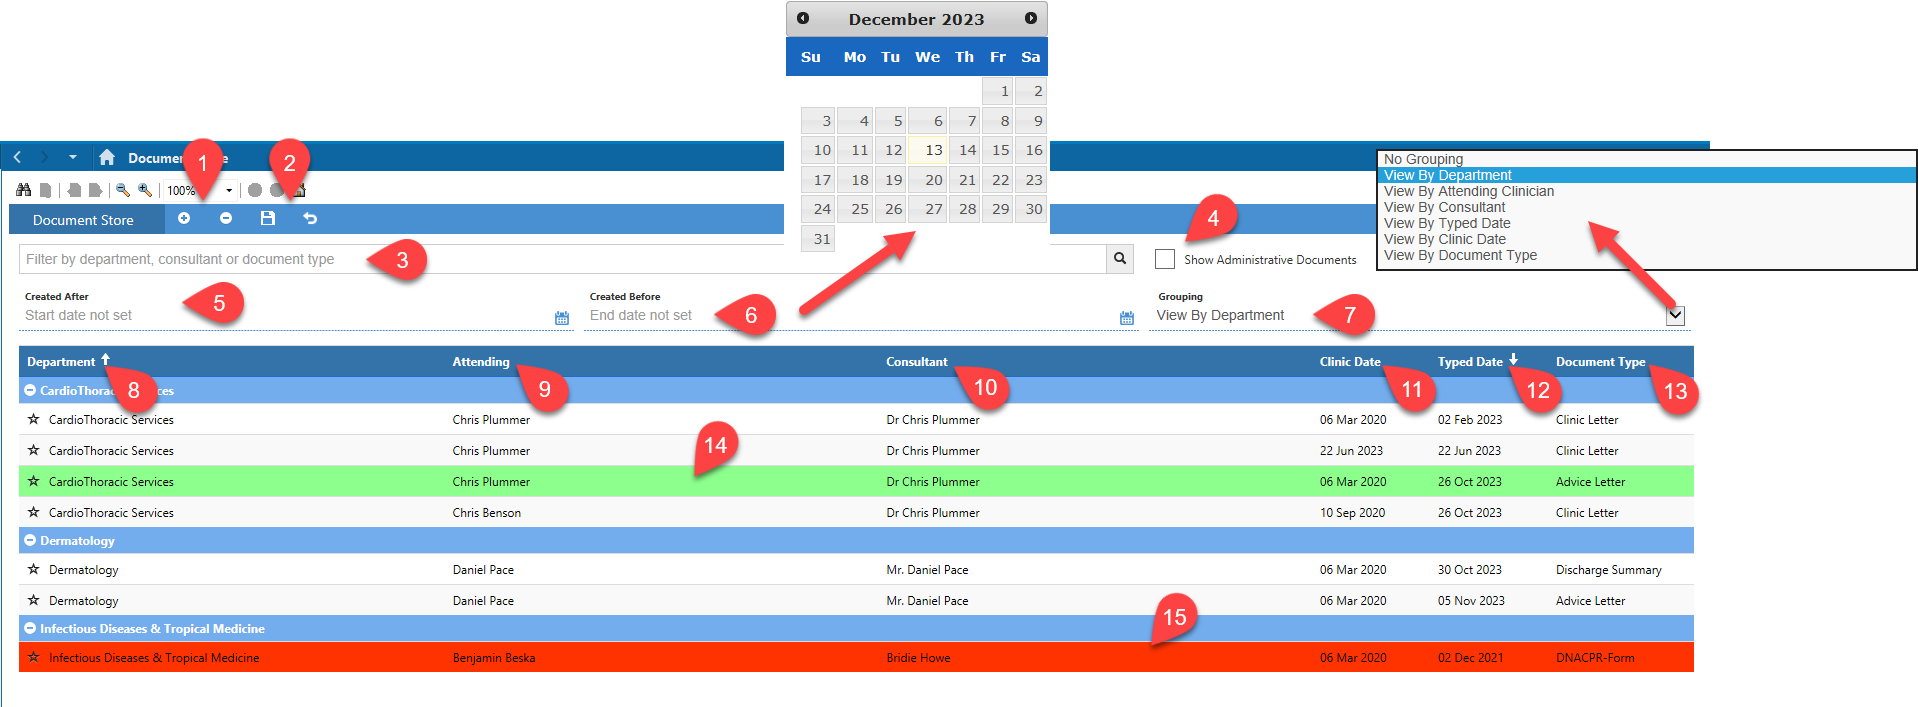
- Collapse all
 or expand all
  departments.
- Save
 or reset view
  .
.
- Filtering – can filter by department, consultant or document type by typing in this field and clicking on appropriate search result.
- Administrative Documents – if you wish to see in list, you must place a tick in this box.
- Created After – can filter for documents created after a specific date. Click on line to open a calendar from which you can click on a date.
- Created Before – can also filter for documents created before a specific date.
- Grouping – defaults to viewing documents grouped by department but clicking anywhere on the line will open a drop-down list from which you can choose no grouping or to group by attending clinician, consultant, typed date, clinic date or document type.
- Department – by default, departments will be listed A to Z, but if click in dark blue menu bar, you can reverse the displayed order.
- Attending – can sort alphabetically by clicking on heading in dark blue menu bar.
- Consultant – can sort alphabetically by clicking on heading in dark blue menu bar.
- Clinic Date – can sort alphabetically by clicking on heading in dark blue menu bar.
- Typed Date – can sort alphabetically by clicking on heading in dark blue menu bar.
- Document Type – can sort alphabetically by clicking on heading in dark blue menu bar.
- After closing a document, it will appear in the list with a green highlight that fades over a short period to aid in recognition of which document was just viewed.
- Red highlighted line represents DNA-CPR form.
Updated: 3 June 2026