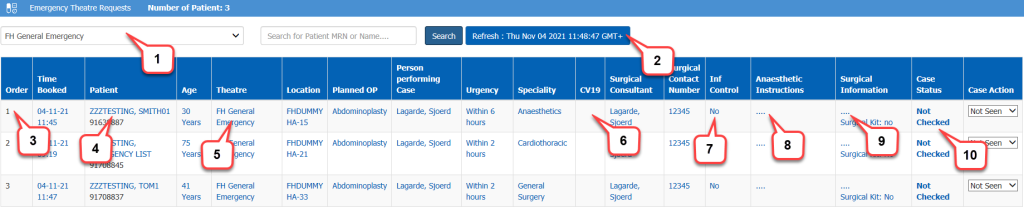
This guide shows an overview of the Emergency List. To access the Emergency List from within Powerchart, click on the View drop down menu at the top left of the screen and select ‘Emergency Theatre’.
Theatre selection drop down. Select the appropriate emergency theatre and click the Search button to retrieve patients.
Refresh button. The list will refresh automatically every minute but can be manually refreshed by clicking this button.
List order column. You can ‘drag and drop’ to put the patients in planned order. Left-click on a patient and hold the mouse button down. Drag the patient to the preferred place on the list then let go of the button.
Patient name and MRN. Clicking on the patient name will open the patient record.
Emergency Theatre. Clicking on the Theatre (‘FH General Emergency’ in this example) will open the original request form, this will allow changes in urgency, infection risk, you can even change the Emergency Theatre.
CV19 column. The CV19 column will show whether the patient has had a COVID19 test done in this trust, it will show the date and status of the test, but not the result.
The Infection Control column shows only the infections entered by the surgeon on booking.
Clicking on the Anaesthetic Instructions dots or comments will open a form to add comments or instructions. Only anaesthetists will have access to this function.
The Surgical Information column contains surgical kit information from the request form, but also has the same functionality as the ‘Anaesthetic Instructions’. Surgeons will be able to add information to this column by clicking on the blue dots.
The Case Status column shows the result of choosing a ‘Case Action’. The default ‘Case Status’ when a case is added is ‘Not Checked’. For more information about how to change the Case Status see this guide.