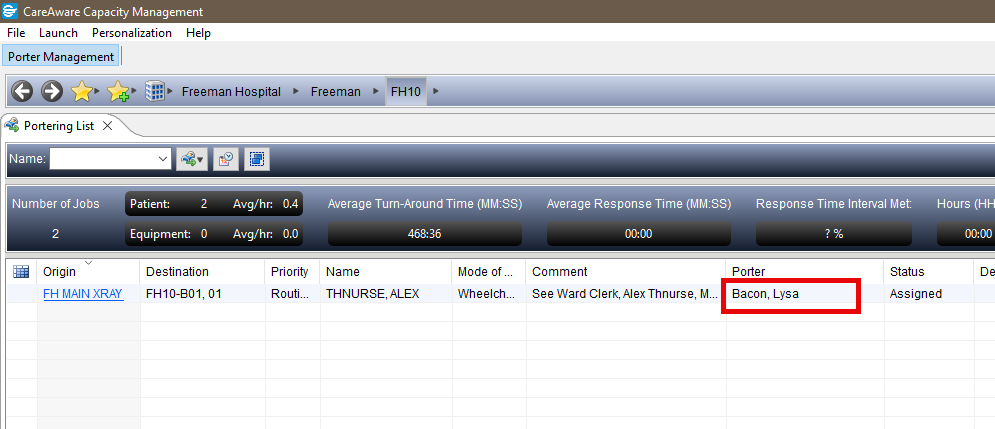
Reassign a Porter
Scenario
Porters are assigned automatically by the system. If your service has a dedicated porter, you can request Porter Management permissions, which allow you to reassign porter tasks as needed.
This guide describes how to reassign a porter.
To request Porter Management permissions, please raise an INC via the
Service Portal.
Instruction
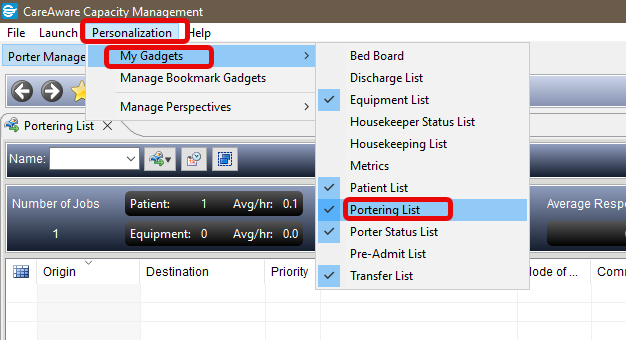
- Make sure the Portering List gadget has been added. Select Personalisation, then My Gadgets, and choose Portering List. A blue tick will appear next to it, confirming that it has been added to your tab bar.
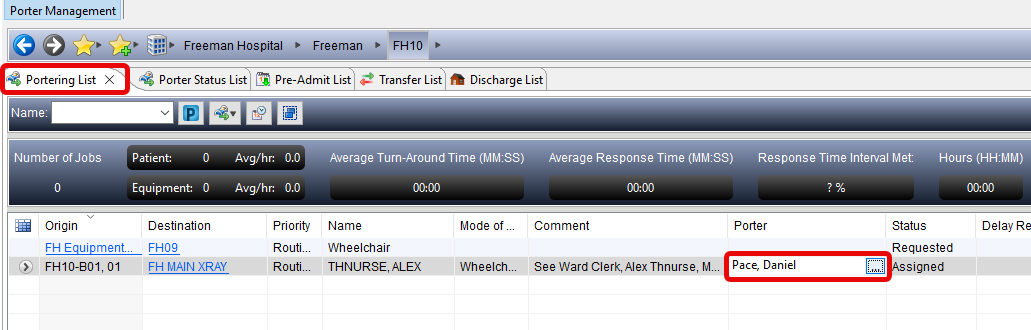
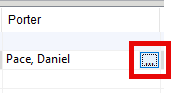
- Click on the Portering List tab and browse the list for the task of interest. Click in the Porter field to reveal the ellipsis symbol (…)
- Click on the ellipsis symbol and the Assign staff window will open.
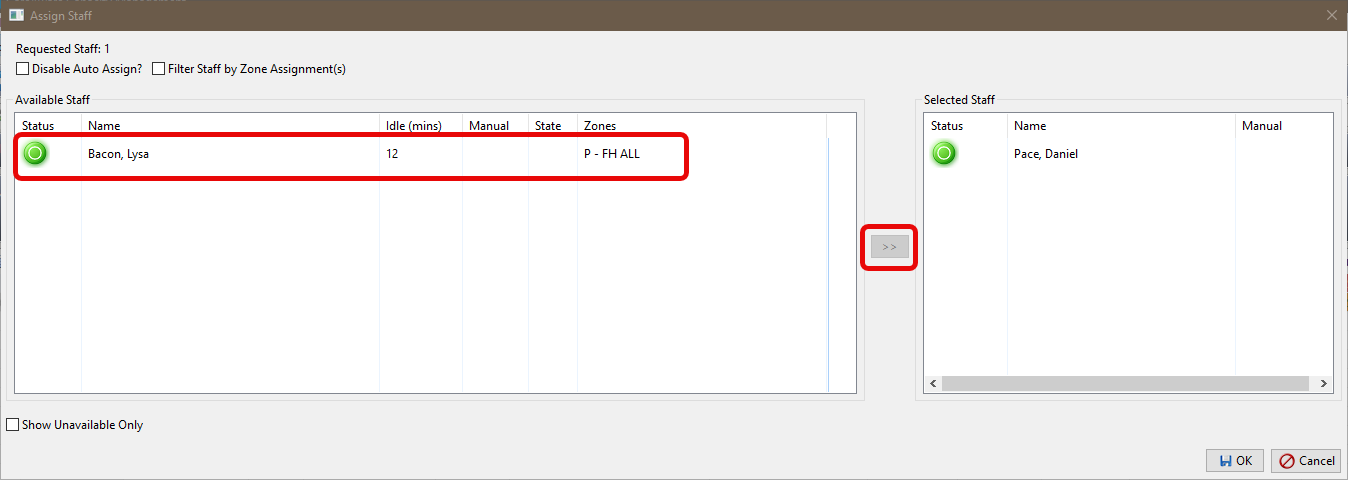
- Select the porter you want to assign from the list on the left side of the window, then click the arrow in the centre. The porter will then appear in the Selected Staff list.
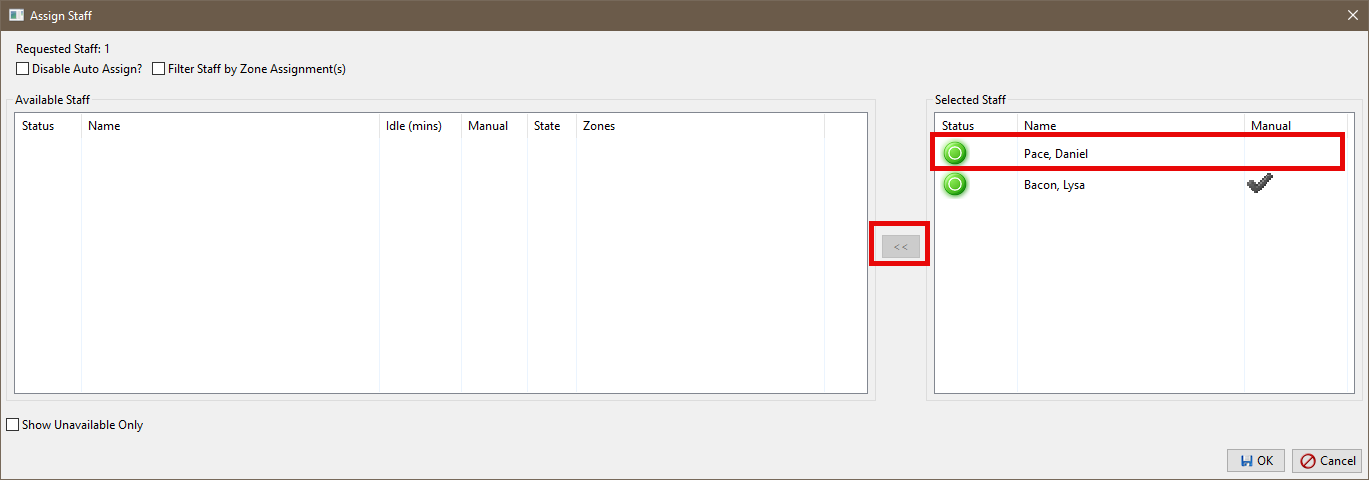
- Remove an assigned porter by selecting their name from the Selected Staff list and clicking the arrow in the centre. The porter will then be moved back to the Available Staff list.
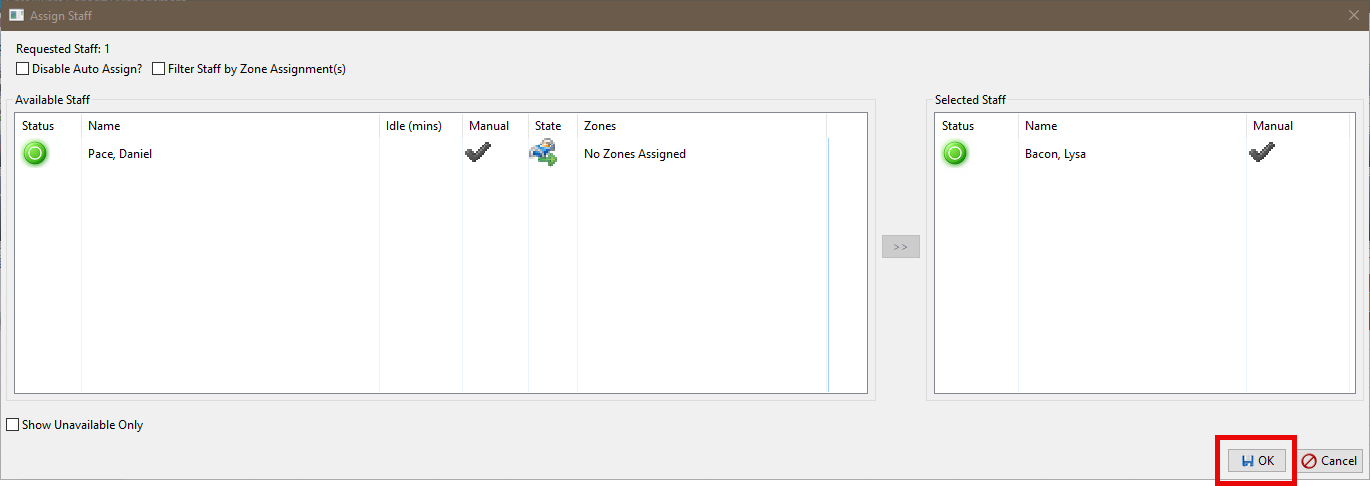
- Click OK (bottom right of window).
- You have now successfully reassigned the porter.