More results...
More results...
To create a Assessment, click on Create New + in the Navigation Menu
Then click Assessment
![]()
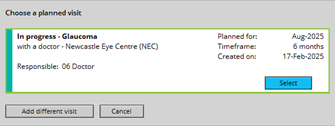
You may get a pop-up window asking you to choose a planned visit. If the patient has arrived for that visit, select it from the window by clicking “Select”, otherwise click “Add different visit” if the patient has arrived for a different visit.
Depending on whether you click on a visit or “Add different visit” depends whether you need to select a Pathway once the assessment loads:
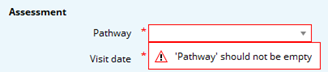
NOTE: you cannot finalise or complete the assessment without selecting the pathway first.
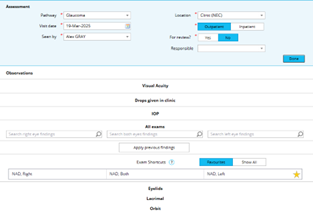
Once the pathway has been selected (or you selected a visit), the full assessment will load.
No matter which pathway is chosen, the same activities will load:
If you need to add extra activities to the assessment (such as presenting complaints), click “More activities” on the left side of the screen.
![]()
You can then select the activity you’d like to add by clicking the “Add” button. A tick will appear then you can click “Done”. It will then add the activity to the assessment. If you find that the activity requires adding often, you can add it as a favourite by clicking the star icon under “Set as favourite”.

Once you have added it as a favourite, it can be clicked on to quickly add that activity to the assessment.
![]()
Whenever you hover over an activity with the cursor, the section will highlight with a light blue colour. You can click into that activity to open it up and enter information.
When an activity has been opened, the section will allow you to document in activity specific fields and each section will also show a “Done” button:
![]()
Clicking this button will minimise/collapse the activity, tidying up the assessment neatly. If you need to go back into the section, simply click on the activity again.
Click on Visual Acuity activity to record information.
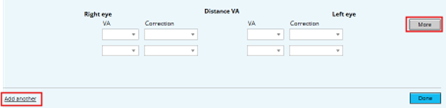
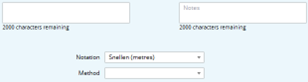
Clicking on the “More” button will expand the section, and provide 2 extra areas: a free-text comment box for each eye, and the ability to change notation / specify method:
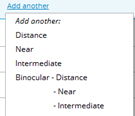
Clicking on the “Add another” text adds a separate test, which asks you to specify what type of test is being recorded:
This functionality is useful when recording a test using more than one notation method, such as recording Snellen and LogMAR in one assessment.
Recording Snellen
To record the test, click on the VA box and then select the score:
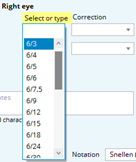
It then immediately asks you which correction method was used:
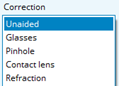
Select a method, and it will the duplicate method that onto the other eye. Click on the other eye’s VA box to record it.
If you are required to perform another test using the same notation but a different correction method, simply repeat this process in the boxes underneath your current test:

If you are only required to do one eye, you can leave the VA box on the other eye (even if the correction method is filled in, it will be blank when you click “Done”)
With the “More” button clicked, change the notation to ETDRS Letter score:
![]()
You may have to enable the letter scorer chart manually, by switching it on:
![]()
If this does not appear, you need to enable it first in your Tools > Settings page.
![]()
Once the scorer chart has been enabled, the chart will display directly underneath the test
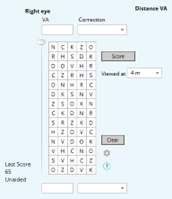
Ensure that the correct testing range is selected:![]()
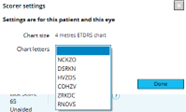
If you need to change letter chart, click the Settings icon,![]() then choose a different chart:
then choose a different chart:
To record the test, click and drag the slider on the left side down to where the patient has scored to:

If you click on a white tile, it will turn the tile green. If you click on a green tile, it will turn the tile red:
![]()
Once finished recording where the patient scored to, click the “Score” button up above:
![]()
Doing so will enter the score into the VA box above, and it will immediately ask you which correction method was used:
![]()
Repeat this process on the other eye as required
NOTE: The patient’s previous score is shown whilst completing the test:

Clicking on the “Drops given in clinic” opens up the activity and allows you to select a commonly given drop from a list, otherwise “Show more drops” can be clicked to show an exhaustive list of drops.
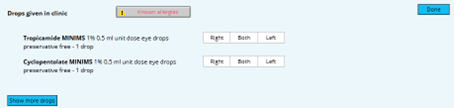
To administer a drop, click on the “Right”, “Both”, or “Left” button:
![]()
When a button is clicked, the corresponding eye will show an administration of the drop (current time when button was clicked) and the drop which was selected (shown in between the boxes):

Free text comments box appears for any extra context or information (e.g: 1% given, 0.5% given)
To retrospectively change the time, click on the time box and manually change the time to the correct time:

Change the time in the “Time given” field and enter a Batch number/expiry date if possible. Click “OK” once finished.
To record pressures, click on the IOP activity section which will open up and look like the following:

Choose the method, then ensure the time of the recording is correct (it will automatically put the current time in the field from when you clicked into the activity). Enter the pressures on each respective eye:
![]()
You can also state the score’s reliability by clicking into the “Reliability” drop down boxes.
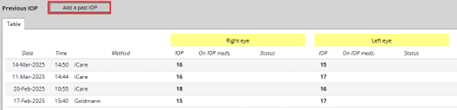
To view past pressure information, click on the “Previous” button:
This will open a pop-up window displaying all past pressures, and will allow you to manually enter a past IOP:
If you are required to record a patient’s pachymetry, click the “More” button:
The CCT fields will display below:
![]()
To add a Refraction to the assessment, it must first be added manually from the “More activities” section on the left side of the assessment. Click on the “More activities” box:
![]()
Find Refraction from the list of activities, then tick the box to its right. Then click “Done”
![]()
If you record Refractions often, add it to your favourites by clicking the star icon to the right.
![]()
The Refraction activity will be added to the assessment. If you have not selected a Refraction default from your Settings > Tools page, the Refraction type box will be empty. Select a Refraction type to record information:

Once a Refraction type has been selected, the corresponding eye fields will appear. Enter the information as needed:

To record any previous findings, click the “Apply previous findings” button in the middle of the exam section
Any previously completed exam will show in blue text, along with its date of when it was recorded.

To confirm that you would like to use these exams, click the “Confirm” button above the exams, otherwise click the “Cancel” button:
To add a new exam and record new data, search for the exam you are performing in the respective eye findings box:
![]()
For example, to record RAPD on the right eye, click into the “Search right eye findings” box, type RAPD, then click on “relative afferent pupillary defect”

This will then add the exam to the corresponding section of the eye(s):
![]()
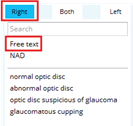
For exams that require manually entering data, such as the Ishihara test, repeat the process by clicking into the “Search both eyes findings” box, type in “Ishihara”, then click on “Ishihara score”
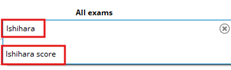
The Ishihara score exam will be added to the Optic disc section for both eyes below:
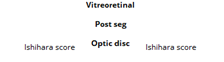
To record the score manually, click on either the right eye Ishihara score or the left eye Ishihara score:
![]()
Doing so will open up a section specific to adding extra information to this Ishihara score:
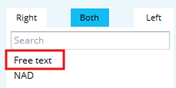
Notice the Right tab is blue, after clicking on the right eye Ishihara score.
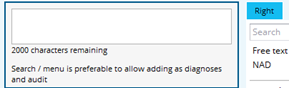
Click on “Free text” to manually enter the score:
A window will appear to either to left or the right (depending which eye you have clicked Free text on). Type in the score results like so:
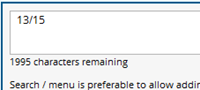
Click on the other eye tab to record the score for the other eye:
![]()
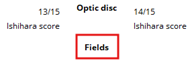
Repeat the process above (Click Free text, enter score) then click “Done” up above to minimise that section
To state you have recorded Fields, click on the Fields section of the eye in the middle of the exam sections:
This will take you into the “Both” tab where you can click on Free text, type in “fields done” and it will copy the text into both eyes:

Once you have finished recording all necessary activities, click the “Finalise” button on the left side of the assessment:
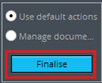
Finalising an assessment will sign the clinical note, take you into the Events page, where it will show you your recently completed assessment. From there, you can review the assessment to make sure information entered is correct, and can edit the assessment from that page if required.