How to Grant Proxy Access to your Message Centre Inbox
Quick Guide
Proxies allow designated user(s) to access your inbox via the Proxies tab.
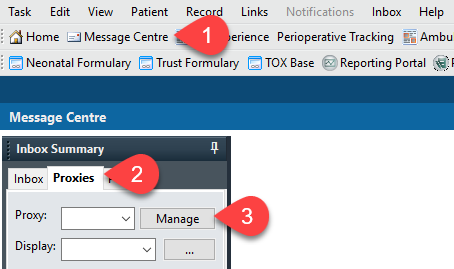
- Navigate to Message Centre
- Select the Proxies tab
- Select Manage

- Select Add towards the bottom of the left panel
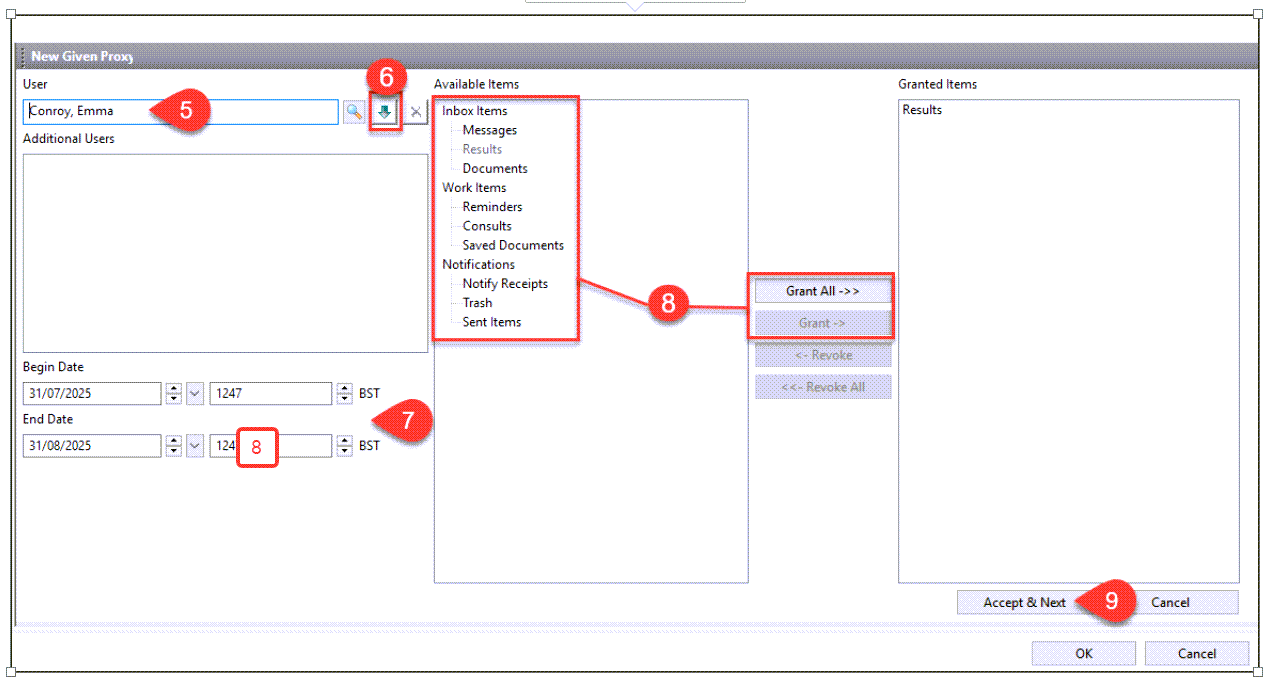
- Search for the user you want to add as a proxy
- To add more than one user, click the down arrow and add the next person in the search box
- Set the begin date and time and the end date and time (N.B. The time must be set 1 minute in the future)

- Select the items you want this proxy to receive and click Grant or to give all items click Grant All
- Click Accept & Next
- The users name(s) will now display in the Proxies Given by Me panel
- Click OK
- Confirmation message Setting saved successfully will display
- Click OK
- The selected user(s) will now receive all an inbox message, sent to their (Message Centre Inbox), to confirm they now have messages. Everything is now shared and include historical investigations. N.B. It is the responsibility of the one giving proxy to proxy to ensure the other one has got it and it was set up correctly.
Updated: 18 November 2025

