More results...
More results...

mediSIGHT can be opened locally by double clicking on the mediSIGHT Icon on the desktop or by opening it via eRecord.
Staff do not have to sign in using a Username/Password, instead they will be signed in automatically as single sign on is enabled (just like Powerchart).
The mediSIGHT Homepage consists of 4 tabs or rows that can be interacted with:

Find patient & Recent patients are explained further below.
Incomplete patients will show any patients whose encounter (such as pre-op assessment, consultation, operation, etc) has been saved for later. This button can be clicked whilst completing the encounter. These patients will stay here for 4 weeks.
Draft documents will retain any letter that has been saved for later, which has not been finalised. These letters will stay here indefinitely.
To find a patient, click into the search box that says “Type hospital or NHS number in full”. This search will only display results that match an MRN or NHS number.
![]()
Left click once anywhere on a search result to open up a patient record.

Alternatively, you can click on “Advanced” to search for a patient using more search fields, such as Surname, First Name, Postcode and D.O.B.

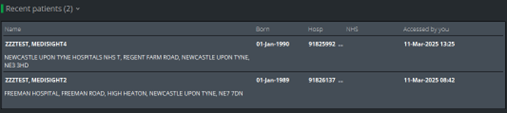
Once a patient record has been opened and closed, it will add the record to your Recent Patients tab.
No matter where you are on a patient record, you will always be able to see:
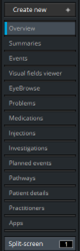
The navigation menu on the left side of the screen:
The banner bar at the top of the screen:
![]()
The banner bar shows important information such as the patient’s name, D.O.B, MRN+NHS no., allergies, address and flags. It also allows you to click the Home button (which takes you back to the mediSIGHT homepage.
You can hover over the allergies section to view their drug allergies and non-drug allergies.
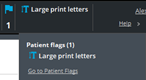
Hovering your cursor over the flags section shows their recorded flags.
When you open a patient record, it will take you to the Overview page. This gives you a wholistic summary of their record, such as which pathways they are on, their diagnoses, any planned procedures and visits, injections, VA’s, IOPs, Diabetic Status and more.
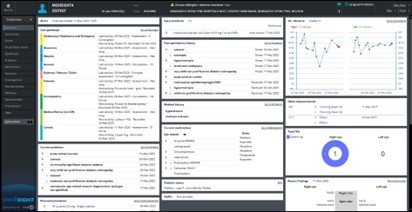
The Plan section (formerly known as Management plan) is located in the bottom left corner of the page, you may have to scroll down to see it.
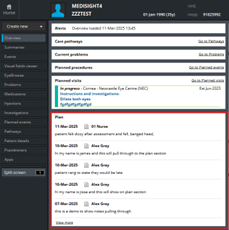
The layout is the same for all staff, regardless of permissions. Only the medical information on the patient’s record will differ per patient.
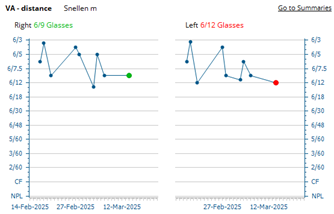
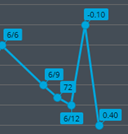
The VA chart will always show in the top right corner of the of Overview page, and will display the patient’s VA scores. If the most recent score (text above chart and circle) is coloured green, their vision has stabilised or improved since their previous test. If the most recent score (text above chart and circle) is coloured red, their vision has deteriorated since their previous test.
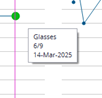
Hovering over a point in the chart will show the test’s score, correction method and date recorded:
To access the Summaries page, click on Summaries in the Navigation Menu
![]()
The summaries page will show a variety of data, which can be changed by using the data boxes above the charts. To view scores on the chart, you can hover over each point.
![]()
The Summaries page has two “views”: Retina or Glaucoma.
Choosing either of these options will display different information. The Retina tab will show injection plans, Visual Acuity and all its relevant information (just like the overview page), as well as IOP down below. The Glaucoma tab will show medication, Visual Fields and IOP down below.
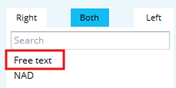
You can select which eye you want to view by selecting either ”Right”, “Both”, or “Left”
![]()
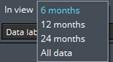
Selecting the “In view” box allows you to select what time frame to pull information from.
Selecting “IOP – Method” or “VA – Correction” allows you to filter the scores shown to be only the choice selected, as by default you will see all tests record using all IOP methods or VA scores using all correction methods.
![]()
Selecting data labels allows you to show all data labels without the need for hovering over them to see their information: (NOTE: you can enable these data labels within your Tools > Settings page, where you only have to do this once and your choices will be remembered, saving you having to enable these data labels every time you visit the Summaries page)

Medications can be reported onto mediSIGHT as they do not pull in automatically from eRecord (Powerchart). Reporting a medication is not prescribing it, it is essentially putting it on their record for informational purposes. You can report a medication halfway through a pre-op assessment, or you can manually report them going into the Medications section:
![]()
The Medications page will show all Current (green) and Past (pink) medications, reported or prescribed within mediSOFT/mediSIGHT
To report a new medication, click on the Report new button
![]()
A section will appear above the medication list and will prompt you to either search for a medication:

Or to select a medication from a list of commonly reported medications:
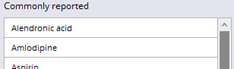
Once a medication has been selected, you will be prompted to enter relevant information:
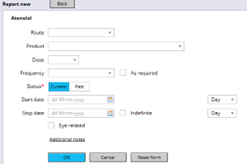
Note: only “Status” is mandatory.
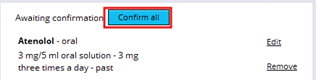
Once information has been entered, click the blue “OK” button, which will then take that information and place it under the medication on the right hand side.
At this point, you can search for another medication and repeat this process to report more, or you can click “Confirm all” to finalise the reporting of the medication.
To create a Assessment, click on Create New + in the Navigation Menu
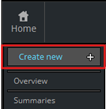
Then click Assessment
![]()
You may get a pop-up window asking you to choose a planned visit. If the patient has arrived for that visit, select it from the window by clicking “Select”, otherwise click “Add different visit” if the patient has arrived for a different visit.
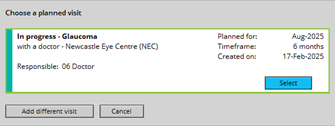
Depending on whether you click on a visit or “Add different visit” depends whether you need to select a Pathway once the assessment loads:
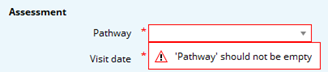
NOTE: you cannot finalise or complete the assessment without selecting the pathway first.
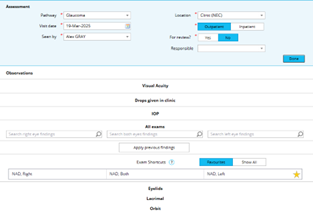
Once the pathway has been selected (or you selected a visit), the full assessment will load.
No matter which pathway is chosen, the same activities will load:
If you need to add extra activities to the assessment (such as presenting complaints), click “More activities” on the left side of the screen.
![]()
You can then select the activity you’d like to add by clicking the “Add” button. A tick will appear then you can click “Done”. It will then add the activity to the assessment. If you find that the activity requires adding often, you can add it as a favourite by clicking the star icon under “Set as favourite”.

Once you have added it as a favourite, it can be clicked on to quickly add that activity to the assessment.
![]()
Whenever you hover over an activity with the cursor, the section will highlight with a light blue colour. You can click into that activity to open it up and enter information.
When an activity has been opened, the section will allow you to document in activity specific fields and each section will also show a “Done” button:
![]()
Clicking this button will minimise/collapse the activity, tidying up the assessment neatly. If you need to go back into the section, simply click on the activity again.
Click on Visual Acuity activity to record information.
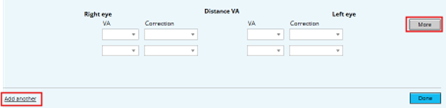
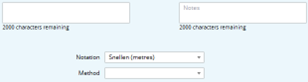
Clicking on the “More” button will expand the section, and provide 2 extra areas: a free-text comment box for each eye, and the ability to change notation / specify method:
Clicking on the “Add another” text adds a separate test, which asks you to specify what type of test is being recorded:
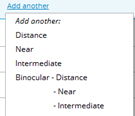
This functionality is useful when recording a test using more than one notation method, such as recording Snellen and LogMAR in one assessment.
Recording Snellen
To record the test, click on the VA box and then select the score:
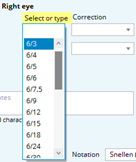
It then immediately asks you which correction method was used:
Select a method, and it will the duplicate method that onto the other eye. Click on the other eye’s VA box to record it.
If you are required to perform another test using the same notation but a different correction method, simply repeat this process in the boxes underneath your current test:

If you are only required to do one eye, you can leave the VA box on the other eye (even if the correction method is filled in, it will be blank when you click “Done”)
With the “More” button clicked, change the notation to ETDRS Letter score:
![]()
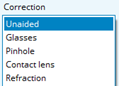
You may have to enable the letter scorer chart manually, by switching it on:
![]()
If this does not appear, you need to enable it first in your Tools > Settings page.
![]()
Once the scorer chart has been enabled, the chart will display directly underneath the test
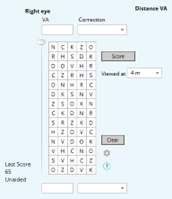
Ensure that the correct testing range is selected:![]()
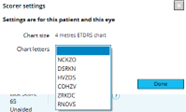
If you need to change letter chart, click the Settings icon,![]() then choose a different chart:
then choose a different chart:
To record the test, click and drag the slider on the left side down to where the patient has scored to:

If you click on a white tile, it will turn the tile green. If you click on a green tile, it will turn the tile red:
![]()
Once finished recording where the patient scored to, click the “Score” button up above:
![]()
Doing so will enter the score into the VA box above, and it will immediately ask you which correction method was used:
![]()
Repeat this process on the other eye as required
NOTE: The patient’s previous score is shown whilst completing the test:

Clicking on the “Drops given in clinic” opens up the activity and allows you to select a commonly given drop from a list, otherwise “Show more drops” can be clicked to show an exhaustive list of drops.
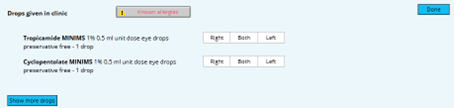
To administer a drop, click on the “Right”, “Both”, or “Left” button:
![]()
When a button is clicked, the corresponding eye will show an administration of the drop (current time when button was clicked) and the drop which was selected (shown in between the boxes):

Free text comments box appears for any extra context or information (e.g: 1% given, 0.5% given)
To retrospectively change the time, click on the time box and manually change the time to the correct time:

Change the time in the “Time given” field and enter a Batch number/expiry date if possible. Click “OK” once finished.
To record pressures, click on the IOP activity section which will open up and look like the following:

Choose the method, then ensure the time of the recording is correct (it will automatically put the current time in the field from when you clicked into the activity). Enter the pressures on each respective eye:
![]()
You can also state the score’s reliability by clicking into the “Reliability” drop down boxes.
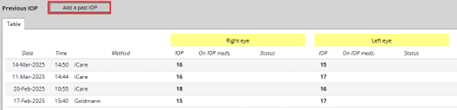
To view past pressure information, click on the “Previous” button:
This will open a pop-up window displaying all past pressures, and will allow you to manually enter a past IOP:
If you are required to record a patient’s pachymetry, click the “More” button:
The CCT fields will display below:
![]()
To add a Refraction to the assessment, it must first be added manually from the “More activities” section on the left side of the assessment. Click on the “More activities” box:
![]()
Find Refraction from the list of activities, then tick the box to its right. Then click “Done”
![]()
If you record Refractions often, add it to your favourites by clicking the star icon to the right.
![]()
The Refraction activity will be added to the assessment. If you have not selected a Refraction default from your Settings > Tools page, the Refraction type box will be empty. Select a Refraction type to record information:

Once a Refraction type has been selected, the corresponding eye fields will appear. Enter the information as needed:

To record any previous findings, click the “Apply previous findings” button in the middle of the exam section
Any previously completed exam will show in blue text, along with its date of when it was recorded.

To confirm that you would like to use these exams, click the “Confirm” button above the exams, otherwise click the “Cancel” button:
To add a new exam and record new data, search for the exam you are performing in the respective eye findings box:
![]()
For example, to record RAPD on the right eye, click into the “Search right eye findings” box, type RAPD, then click on “relative afferent pupillary defect”

This will then add the exam to the corresponding section of the eye(s):
![]()
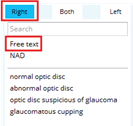
For exams that require manually entering data, such as the Ishihara test, repeat the process by clicking into the “Search both eyes findings” box, type in “Ishihara”, then click on “Ishihara score”
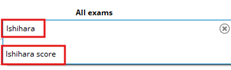
The Ishihara score exam will be added to the Optic disc section for both eyes below:
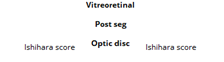
To record the score manually, click on either the right eye Ishihara score or the left eye Ishihara score:
![]()
Doing so will open up a section specific to adding extra information to this Ishihara score:
Notice the Right tab is blue, after clicking on the right eye Ishihara score.
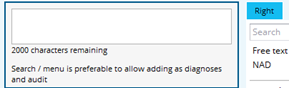
Click on “Free text” to manually enter the score:
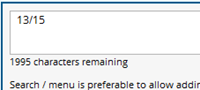
A window will appear to either to left or the right (depending which eye you have clicked Free text on). Type in the score results like so:
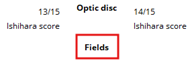
Click on the other eye tab to record the score for the other eye:
![]()
Repeat the process above (Click Free text, enter score) then click “Done” up above to minimise that section
To state you have recorded Fields, click on the Fields section of the eye in the middle of the exam sections:
This will take you into the “Both” tab where you can click on Free text, type in “fields done” and it will copy the text into both eyes:

Once you have finished recording all necessary activities, click the “Finalise” button on the left side of the assessment:
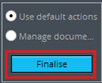
Finalising an assessment will sign the clinical note, take you into the Events page, where it will show you your recently completed assessment. From there, you can review the assessment to make sure information entered is correct, and can edit the assessment from that page if required.
To access the Events page, click on Events in the Navigation Menu
![]()
The events page will show all clinical data recorded on the patient’s record on mediSIGHT. Events included: notes, phone call discussions, assessments, pre-op assessments, visual fields, virtual reviews, consultations, letters sent to GP/Patient, etc.
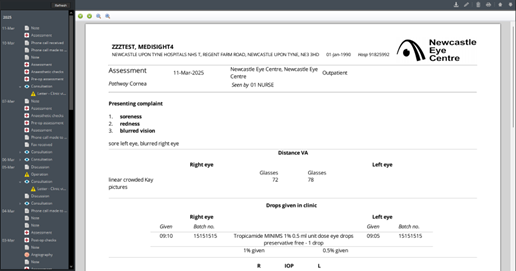
You can zoom in/out on a document by using the magnifying glass
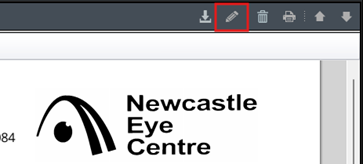
There are multiple actions you can do when viewing a document (top right hand corner of screen):
1) Download This will download a PDF file of the encounter locally onto the computer
2) Edit This is only available to click on an encounter within the first 24hr of finalising
3) Print This will print a copy of the encounter to your local printer
If you see an arrow next to a clinical note, such as a consultation, it means there is a letter attached. Click the arrow to view the letter.
![]()
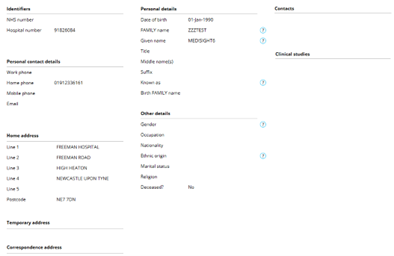
To access the Patient Details page, click on Patient Details in the Navigation Menu
![]()
There are 3 tabs available to view/enter information in; the Demographics tab, the Allergies tab and Flags tab:
![]()
The Demographics tab pulls information from eRecord and displays personal details such as identifiers, contact numbers, address, etc. This information cannot be amended within mediSIGHT, as it will be overwritten regardless from the information stored on eRecord. If any information requires rectified/updating, it MUST be changed in eRecord for it to update in mediSIGHT.
The flags tab allows staff to view patient flags in more detail, showing a list of their flags, any comments related to those flags, and the duration of the flags.
![]()
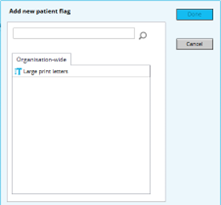
To add a Flag, click on the “Add new flag” button in the top right corner of the screen:
![]()
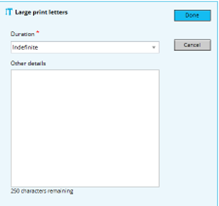
A side window will appear, allowing you to choose a flag from a list, or to manually search for a flag. Select a Flag and the window will change, asking you to specify its duration, and whether you’d like to include any comments. Click the blue Done button to finalise.
You can now see the flag added to the patients record

To create a Note, click on Create New + in the Navigation Menu
Then select Note
![]()
The note creation page will load and will look like the following:
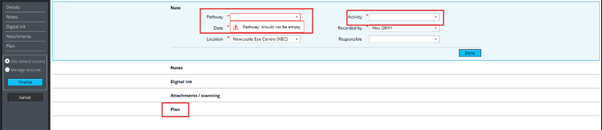
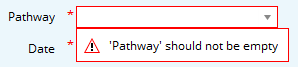
There will be some mandatory fields that require filling in prior to writing a note:
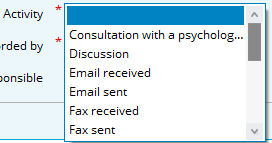
You will always have to select an Activity. The activity is simply stating what you are intending to create (phone call discussion, note, email received, letter received, etc)
Once both fields have an option selected, you can move on to writing the note.
![]()
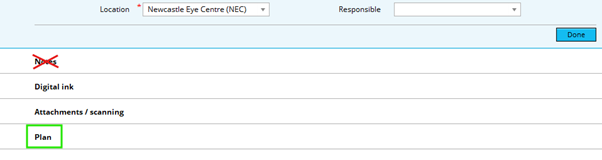
To write a note, click on the Plan activity below:
!!! DO NOT CLICK ON THE NOTES ACTIVITY, AS ANYTHING RECORDED HERE WILL NOT PULL THROUGH TO THE OVERVIEW PAGE !!!
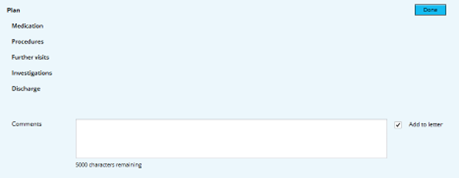
The plan section will open and you will see a comments box, that allows you to type 5000 characters for your note. Enter your information here.
Once you have finished typing your note, click the Finalise button on the left side of the page:
![]()
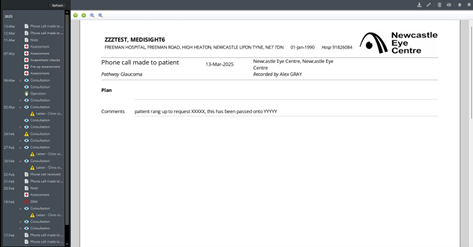
This will finalise and sign/submit the note, which will then take you to the Events page to show you where abouts the note is saved, and if you need to access it at a later date. Check your note for errors, etc.
If the note requires amending, you can click the pencil icon to Edit the note. You have 24 hours from when you last Finalised the note to make any changes. Afterwards, it becomes locked.
Clicking the Edit icon will take you back into the note to make any required changes. Remember to click Finalise again if you have made any changes.
To close the patient record and go back to the homepage, click the Home button in the top left corner of the screen. This button can be accessed at all times, regardless of which page you are on.
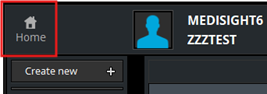
To close mediSIGHT completely, click the X button in the top right corner of the program.
![]()